Downlight drill hole diameter: the method that avoids mistakes
This article is also available in French: Diamètre perçage spot
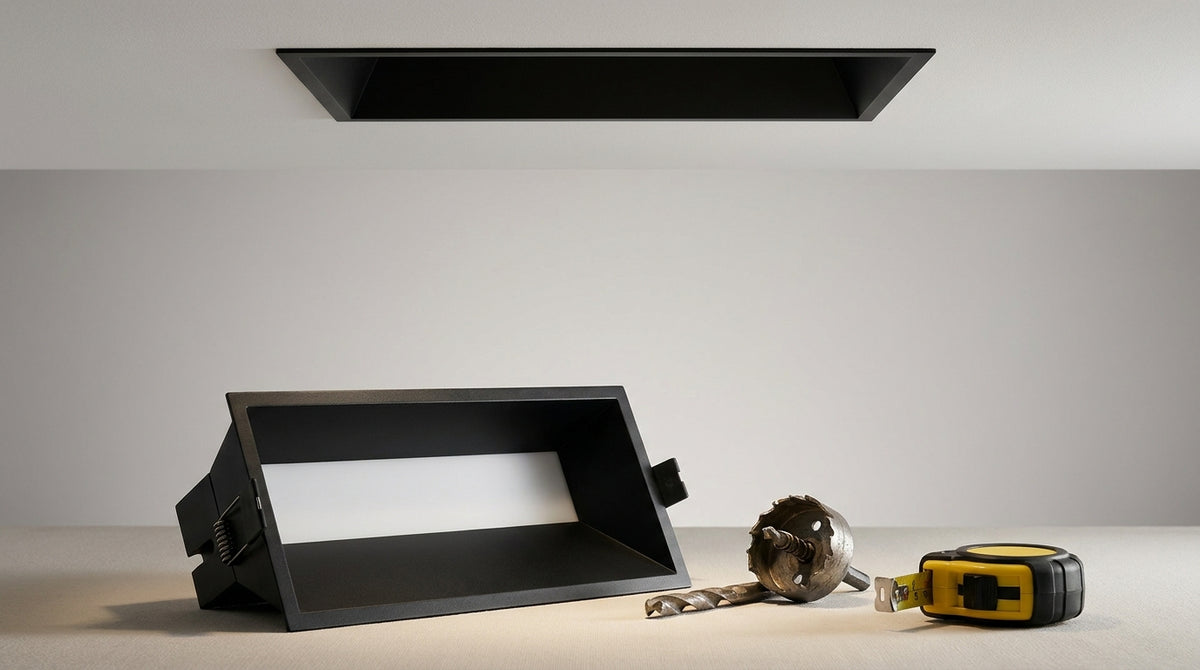
The recess diameter is read on the product data sheet, never on the trim ring: usually allow 68 to 70 mm for a standard ceiling downlight, and 55 mm for a mini format. That value, and only that value, determines the hole saw to order.
What size is a hole for a downlight?
The hole is drilled to the recess diameter stated by the manufacturer: 55 mm for a mini downlight, 68 to 70 mm for the most common format, 75 to 90 mm for an adjustable model, 110 to 120 mm for a large format. The technical data sheet is authoritative, never the box or habit.
Almost every mistake comes from using one word for another: the trim ring, the visible ring that hides the edges of the hole, measures 10 to 20 mm more than the recess. A downlight listed as 90 mm therefore sometimes fits into a 68 mm hole. Only the recess diameter determines the hole saw, and our collection of recessed LED downlights states it for every reference.
| Recess diameter | Downlight type | To check before drilling |
|---|---|---|
| 55 mm | Mini downlight, dressing room, under-cabinet | That the data sheet states 55 and not 50 |
| 68 to 70 mm | Standard ceiling downlight, living room | What runs above: insulation, joist, duct |
| 75 to 90 mm | Adjustable or high-power downlight | The tilt range, which needs clearance at the sides |
| 110 to 120 mm | Large volume, utility room, retail | The nature of the substrate and the load it carries |
If your ceiling is concrete, panelled or filled with insulation, describe your substrate to us before drilling: we will confirm the right diameter and model.
Which hole are you going to drill?
What is the standard drill hole diameter?
The French standard is 68 mm, with a frequent tolerance up to 70 mm depending on brands and years. A 68 mm hole saw therefore covers the majority of ceiling downlights intended for a home, from the hallway to the living room.
- Recess diameter: the hole to drill, the one that decides everything else.
- Outer diameter: the visible trim ring, always wider, which hides the edges.
- Recess depth: the clearance needed behind the plate, often forgotten.
- Base type: replaceable GU10 or integrated LED module, two opposing constraints.
68 mm drill hole diameter: the most common format
A downlight listed as 68 mm fits into a 68 mm hole, not into a 70 mm one chosen "to leave some margin". A plasterboard panel tolerates play poorly: a 2 mm gap can be taken up with a rasp, whereas a hole that is too large stays visible under the ring for years.
55 mm drill hole diameter: mini downlight, dressing room and under-cabinet
The 55 mm format is used for mini downlights: dressing rooms, wall units, small hallways, bathroom ceilings. The light is tighter, more precise, often used to highlight a niche or light a worktop rather than to light a wide area.
Two families coexist in this format. A 55 mm recessed LED downlight sits almost flush with the ceiling and goes unnoticed.
Conversely, a 55 mm recessed downlight with a pronounced trim ring stands out more and becomes a decorative detail in its own right.
Before getting the drill out, it is better to mark the points, check what runs above, then drill. Our guide to installing ceiling downlights details the order of operations.
Which hole saw diameter for a downlight?
The hole saw is chosen on the recess diameter, never on the outer diameter: a 68 mm saw for a 68 mm downlight. If the exact value does not exist in the tool aisle, take the size just below and finish with a rasp. Enlarging can be corrected, shrinking cannot.
- Check the value on the product data sheet before buying the tool, not after.
- Mark with the paper template supplied with the fixture, when there is one.
- Drill at moderate speed, without pressing, so as not to shatter the panel.
- Check the space above: joist, duct, compressed insulation.
Recessed downlight, 85 mm drill hole diameter: what changes
An 85 mm hole does not change the method, but the margin. The hole is wider, and therefore closer to the joists and ducts that cross the ceiling. In exchange, the beam reaches further and fewer points are needed to cover a room, which changes the whole layout grid.
These diameters often accommodate adjustable models, which can be set after installation. A directional downlight lets you move the beam towards a wall or a picture without touching the ceiling.
Can you drill at 70 mm for a 68 mm downlight?
Technically yes, most trim rings cover the gap. In practice, the downlight loses its support and can tip into the void. Drill accurately, and enlarge only if the housing resists.
Recessed downlights: the selection by recess diameter


What is the drill hole diameter for a GU10 downlight?
A GU10 downlight is generally drilled between 68 and 80 mm, but it is the depth that decides: a GU10 bulb measures about 55 mm long, against around fifteen millimetres for an integrated LED module. A thin hollow ceiling therefore rules out GU10 from the start.
In an in-house survey of 249 downlight references on 29 September 2026, 96% mention LED and 3% a GU10 base, the base being stated on 247 of the 249 data sheets. The integrated format dominates, and it requires a check: can the module be replaced, or must the whole fixture be changed?
Does a GU10 need a deeper housing?
Yes, and it is rarely written clearly enough. Three points are checked before drilling:
- The socket height: it adds to that of the bulb, not the other way round.
- The actual clearance: compressed insulation or panelling reduce the available space.
- Replacement: a GU10 bulb can be changed, an integrated module cannot.
GU10 downlight or integrated LED: which to choose?
GU10 wins on maintenance: the bulb can be replaced and the colour temperature corrected without removing the downlight. The LED module wins on bulk and on the finesse of the rendering. If access to the ceiling is difficult, a model where changing the bulb of a recessed downlight remains possible without tools is preferable.
How do you fix a hole that is too large in a ceiling?
Three options depending on the gap: the trim ring of the new downlight may be enough, a wider mounting plate or rosette may cover the hole, or filling with filler allows a clean re-drill. None requires taking down the ceiling.
- 1 to 5 mm too large: the trim ring often covers the gap without an accessory.
- 5 to 15 mm: a cover plate or rosette restores the support.
- Beyond that: fill, dry completely, mark with the template, drill again.
Is a recessed downlight cover mandatory?
No rule imposes it in every case. But as soon as glass wool rests against the back of the downlight, the cover becomes the useful part: it keeps the insulation at a distance and prevents the fixture from working in contact with it. Some manufacturers make it mandatory in their installation instructions, and reading them before mounting avoids many disappointments.
Drilling impossible: recessed downlight or ceiling light?
When the substrate cannot be drilled, the question of diameter disappears. Solid concrete, slab, old panelling, a ceiling you would rather preserve: a LED ceiling light is fixed to the existing substrate and lights the room without a through hole.
The result is not the same. A ceiling light diffuses more widely and more softly, whereas downlights draw cones. In a living room, a ceiling light treated as an object in its own right often replaces a grid of six points.
If you are unsure about the nature of the substrate, the Designix Google listing gathers feedback from equipped customers: check it before deciding.
How many downlights, and at what distance, for the drilling to make sense?
Allow one 68 mm downlight for 1.5 to 2 m² in general lighting, in a regular grid, 40 or 60 cm from the walls. The number matters less than the grid: two badly placed downlights leave more shadow than one well centred.
This grid is decided before the work, at the moment when the volumes are rethought. Our page on living room and main room renovation shows how lighting fits into this overall plan.
- Start from the walls: the first line is set relative to the wall, not the centre of the room.
- Regularity: a constant gap reads as a design, a floating gap as a mistake.
- Furniture: the grid follows the room, not the sofa, which will move.
- Use: general lighting and highlighting a worktop are not counted the same way.
What is the minimum distance to keep between a downlight and the wall?
Too close, the wall is lit in a patch; too far, the corner of the room stays dark. The right value depends on the ceiling height and on what you want to highlight. The details of each case are in our article on the distance between a downlight and the wall.
How do you lay out downlights on the ceiling?
A grid is drawn on the floor before being marked on the ceiling: the points are placed on a plan, the gap is checked, then transferred. Our guide on the distance between ceiling downlights gives the basic references.
The number itself is calculated according to the surface area and the ceiling height, with how many downlights per m².
The kitchen deserves separate treatment: wall units impose their own constraints, and choosing a kitchen light completes the grid without multiplying the points.
In stock · shipping costs shown at checkout · up to 30% off in your cart


Ready to turn inspiration into reality?
Tell us about your room, your style and your budget, and we will show you the pieces that truly suit your project.
Get guidance in 30 seconds →