Changing the LED in a bathroom mirror: the step-by-step guide
This article is also available in French: Comment changer led miroir salle de bain
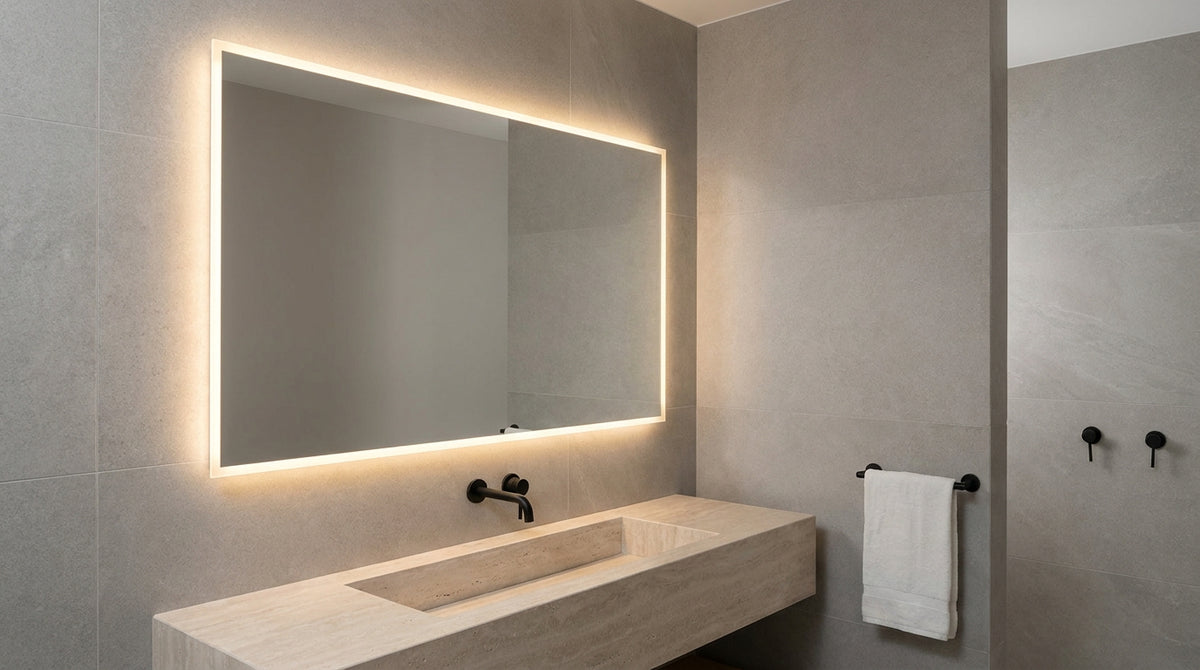
Identify the mounting type first. A socket bulb is replaced on its own, an LED strip is changed along with its transformer sometimes, a module sealed in resin means replacing the whole mirror. Three cases, three approaches, and none should be attempted without switching off the circuit breaker.
Repair almost always costs less than a full replacement, provided you identify what has failed. The catalogue brings together 2,656 references of bathroom lights, many of which reuse existing fixings. A look at the bathroom lights before dismantling saves plenty of unnecessary holes.
Is it possible to replace an LED on a bathroom mirror?
Yes, in two out of three cases, and not in the same way. An LED screwed onto a socket is replaced like a standard bulb. A strip can be bought separately and re-stuck. A module moulded in resin cannot be dismantled: the whole mirror goes for replacement. The diagnosis takes two minutes, mirror switched on, screwdriver in hand.
Integrated LED, strip or socket bulb: how to know what you have
Turn the mirror over and look at the profile thickness: the thinner it is, the more the LED is embedded in the body.
- Screws around the edge: the plate unscrews, the LED is accessible.
- Flexible adhesive ribbon: it is a strip, it can be cut and re-stuck.
- Smooth, sealed surface: sealed module, no individual replacement.
Once the diagnosis is made, the order comes down to two details. On a sample of 157 listings from our catalogue as of 29 September 2026, 85% declare an IP20 protection rating: a useful reminder, since a bathroom is not a dry room. Before buying, have your measurements and your IP rating validated by the workshop, it avoids a parcel going back and forth. Simply ask an advisor your question, with photos of the back of the mirror.
When the fault is not the LED: transformer and touch switch
An LED that flickers or a touch switch that no longer responds rarely points to the LED itself.
- Transformer: housed in the thickness of the mirror, it hums or heats up before failing. It can be replaced if the output voltage is identical.
- Touch switch: a damp surface is enough to make it temperamental. Dry it and retest before dismantling.
- Wiring: a loose connector at the back explains many blackouts.
These same settings decide the final atmosphere, a point developed in our guide to lighting your bathroom like a spa.
How do you change an integrated LED bulb with a bezel?
Turn the bezel a quarter turn anticlockwise, then remove the socket. On a clip-on model, slide a thin spatula under the edge and lever gently. Switch off the circuit breaker first, and let it cool: the metal bezel holds heat.
Changing the bulb in a mirror spotlight with or without a bezel
- With bezel: by hand, never with pliers, the metal marks quickly.
- Without bezel: the spotlight is held by two springs, press and pull towards you.
- Tilting spotlight: unplug the connector before unscrewing, the socket turns with the axis.
- Stuck socket: a few drops of penetrating oil, then a little patience.
The steps change depending on the mounting, and our article on changing the bulb in a bathroom mirror covers each case.
Changing a G9 bulb on an illuminated mirror
The G9 base runs on 230 V, without a transformer: the bulb is removed by pulling straight. It is the simplest mounting to get working again.
- G9: fine pins, remove with two fingers, never by pulling on the glass alone.
- Blackened socket: if the pins mark, the ceramic socket can be changed too.
Replacement models are found among G9 bulbs, to be chosen in 2700 K for a flattering result above the washbasin.
Illuminated mirrors and bathroom wall lights
 Modern Bathroom Globe Wall Light | Luminance
 Oval tube bathroom wall light | Fiye
 ZAMBELIS Bathroom Wall Light 20W CCT IP44 DESIGN Sand White 25457
 Dimmable bathroom wall light | Qilo
 Round tilting bathroom spotlight | Lisio
 Black bathroom wall light | Calix
See the whole selection: Bathroom Lights, Ceiling, Wall or Mirror Lighting
When the mirror itself is at the end of its life, replacing it sometimes takes less effort than repairing it. It is also an opportunity to rethink the bathroom light around it.
How do you fix a bathroom mirror to the wall without drilling?
Three solutions hold without a drill: high-strength adhesive strips for a small unframed mirror, suction fixings for temporary use, and hot-melt glue hooks. A backlit mirror, heavier and connected to the mains, requires a wall plug.
At what height should an illuminated mirror be placed above the washbasin
The bottom of the mirror sits about twenty centimetres above the vanity top, and the centre falls at eye level. Too high, the light illuminates the wall; too low, it dazzles at water level.
- Vanity top at 85 cm from the floor: the mirror starts around 105 cm.
- Large mirror: align its top edge with the eye line, not with the tiling.
- Side wall light: at face height, it replaces frontal light; a well-placed wall lamp lights both sides of the face.
These markers are also useful when the bathroom renovation covers the whole wall. The dimensions of a wall light are detailed in our feature on the height of a wall light.
Which protection rating to require depending on the distance to the shower
The closer the fitting is to water, the higher the rating. The distance to the shower decides, not the style of the light.
| Zone | Situation | Rating to aim for |
|---|---|---|
| Inside the shower volume | direct splashes | IP65 |
| Less than 60 cm away | above the washbasin, facing the bath | IP44 |
| Beyond 60 cm | dry wall, room entrance | IP20 accepted, IP44 preferable |
The sample of our 157 listings, still as of 29 September 2026, confirms the market's caution: 10% show an IP44 and 2% an IP65, the rest remaining at IP20. A backlit mirror above a washbasin is fine with an IP44; in the shower, only an IP65 holds.
To cover this point, browse our LED bathroom wall lights. Our note on the IP44 bathroom wall light helps you decide, and bathroom lighting mistakes lists the pitfalls to avoid.
In front of your bathroom mirror, which case is yours?
How do you replace a bathroom light or a small fluorescent tube with LED?
Remove the fluorescent tube, keep the cable entry and remove the ballast: most LED battens connect directly to 230 V. The trickiest part is not the wiring but the colour tone. A 4000 K makes the room crisp, a 2700 K stays flattering at the mirror.
Changing a fluorescent tube to LED without redoing the wiring
- Switch off at the circuit breaker and check that there is no voltage with a tester.
- Unclip the diffuser, remove the tube, then open the housing.
- Identify the 230 V supply and remove the ballast, now unnecessary.
- Connect the batten to live and neutral, without forgetting the earth.
- Close it up, switch the power back on, check the colour tone facing the mirror.
Identifying the wires is easier with our guide to wiring a light fitting, especially when the earth is missing at the consumer unit.
Taking measurements before ordering a wall light or a pendant
The gap between the existing drill holes is the only dimension that avoids re-drilling. Note it down before looking at models.
- Fixing centres: measured from centre to centre, to the millimetre.
- Depth: a deep wall light gets in the way of opening a bathroom cabinet.
- Cable outlet: its position must remain hidden behind the light's cover.
- Ceiling height: it decides between an LED ceiling light and a wall light.
In a wet room, it is better to avoid hanging models and choose a bathroom light fixed to the wall or ceiling. Before confirming a basket, a look at the company's Google listing shows what buyers say about this support.
In stock · shipping costs shown at checkout · up to 30% off in your cart


Ready to turn inspiration into reality?
Tell us about your room, your style and your budget, and we will show you the pieces that truly suit your project.
Get guidance in 30 seconds →