Installing a light fixture: the safe, step-by-step guide
This article is also available in French: Brancher luminaire
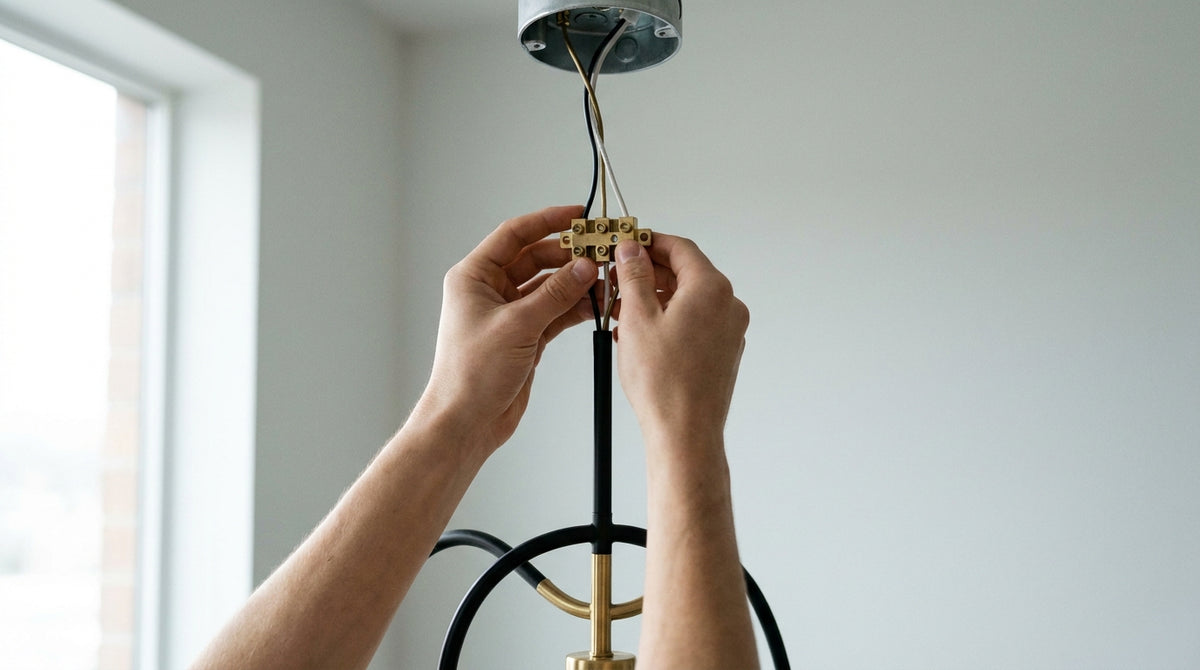
Wires protruding from the ceiling and doubts about the connection: connecting a light fixture actually only takes four steps. Switch off the power at the circuit breaker, verify the absence of voltage, connect the blue wire to the neutral (N) and the brown to the phase (L), then the green/yellow to the ground if present. The rest depends on your installation.
Before screwing it in, two benchmarks change everything: the type of electrical outlet on the ceiling and the format of the light fixture. Our lighting collection brings together 22,880 references as of September 20, 2026, from lightweight ceiling lights to heavy pendant lights, each with its own installation constraints.
How to connect the wires to a light fixture?
Connect each wire to its counterpart by color: the blue to the neutral, the brown (or red, or black) to the phase, the green/yellow to the ground. On a recent DCL box, these wires plug into a standardized plug; on an old terminal block, they are tightened in a connector block. Always turn off the power before touching anything.
- Turn off the power at the main circuit breaker and verify the absence of voltage with a tester.
- Strip each wire by about 1 cm if the ends are damaged.
- Connect the blue to the neutral (N), the brown to the phase (L), the green/yellow to the ground.
- Plug in the DCL connector or tighten the connector blocks, then check that no copper is exposed.
- Attach the support, reassemble the fixture, and restore the power to test.
Doubts about the DCL box, a supply without ground, or a heavy light fixture to hang? It is better to check before screwing in: you can ask our team your question, it avoids having to redo the connection.
How to connect the blue and brown wires of a chandelier?
The blue connects to the N terminal (neutral), the brown to the L terminal (phase). Without a ground, these are the only two wires to connect. On a three-wire chandelier, add the green/yellow to the ground. Respect this order: reversing neutral and phase leaves the device live even when turned off.
A heavy chandelier never rests solely on the DCL plug: its hook must support the weight. For an imposing model, it is better to install a chandelier safely by first fixing a solid bracket to the ceiling.
You may also come across cases with two blue and red wires, or a 3-wire connection depending on the age of the housing. The principle remains the same: one color per function, never two active wires on the same terminal.
What are the different connection types for light fixtures?
Three cases cover the essentials: the DCL box (standardized plug, most common in new builds), the old terminal block, and the wall light controlled by an integrated switch. On a survey of 250 pendants from our catalog as of September 20, 2026, wall mounting represents 40% and suspended 38%.
The ceiling lights to fix to the ceiling are most often installed on DCL. Pay attention to water resistance: 94% of that same survey carry the IP20 rating, intended for a dry room. In a bathroom, check the IP before connecting.
For the detailed procedure on this common support, follow our guide to connect a ceiling light step by step.
In a dining room or above an island, pendant lights require adjusting the height of the cable before the final connection. Identify your model before choosing the method.
Ready-to-connect light fixtures, to be chosen according to your room
 Natural Pendant Light | Erel
 Dallas Gold Pendant Light
 Puntes Gold Pendant Light
 Erich Silver Pendant Light
 Chic and Modern Chandelier | Lueur Fluxion
 Erich Gold Pendant Light
See full selection: Lighting, Home Lighting, Online Lighting Store
How to connect a 2-wire light fixture?
A two-wire fixture has no ground: connect the blue to the neutral, the brown to the phase, and leave the ground terminal free. This is the case for Class II (double insulated) devices, common on small pendant lights and wall sconces. If your ceiling only delivers two wires, never connect a device that requires a ground.
Two wires on the ceiling but a three-wire fixture: the missing ground mainly concerns older buildings. A Class I device loses its protection there; choose a Class II model or have a qualified professional pull a ground wire.
Mounting then depends on weight and support, plasterboard or concrete. A suitable anchor avoids pulling out, especially for a loaded pendant.
Which light fixture are you going to connect?
What is the difference between E14 and E27?
E14 and E27 designate the diameter of the screw base in millimeters: 14 mm for the small one, 27 mm for the standard one. The E27 accommodates more powerful bulbs, the E14 equips small lamps and candle-style chandeliers. On the survey of 250 pendants as of September 20, 2026, the E27 base appears on 29% of listings and the E14 on 12%.
Check the base before buying the bulb: an E27 does not screw into an E14 socket. To compare all formats, consult our reference guide on bulb types and bases.
LED dominates today, including on dimmer models. If you opt for this technology, learn how to connect an LED to avoid flickering with certain older dimmers.
Then there's the rendering: the same bulb changes a room depending on its hue. Our article to choose the light temperature helps you decide between warm white and cool white.
Every reference in the selection is CE certified across the entire survey and guaranteed for 2 years in 96% of cases; it is commented on by buyers, whose reviews are published on our Google listing. In case of doubt about the electrical installation, a qualified professional is still required.
In stock · shipping costs shown at checkout · up to 30% off in your cart


Ready to turn inspiration into reality?
Tell us about your room, your style and your budget, and we will show you the pieces that truly suit your project.
Get guidance in 30 seconds →