How to remove a round ceiling light: the no-break method
This article is also available in French: Démonter un plafonnier rond
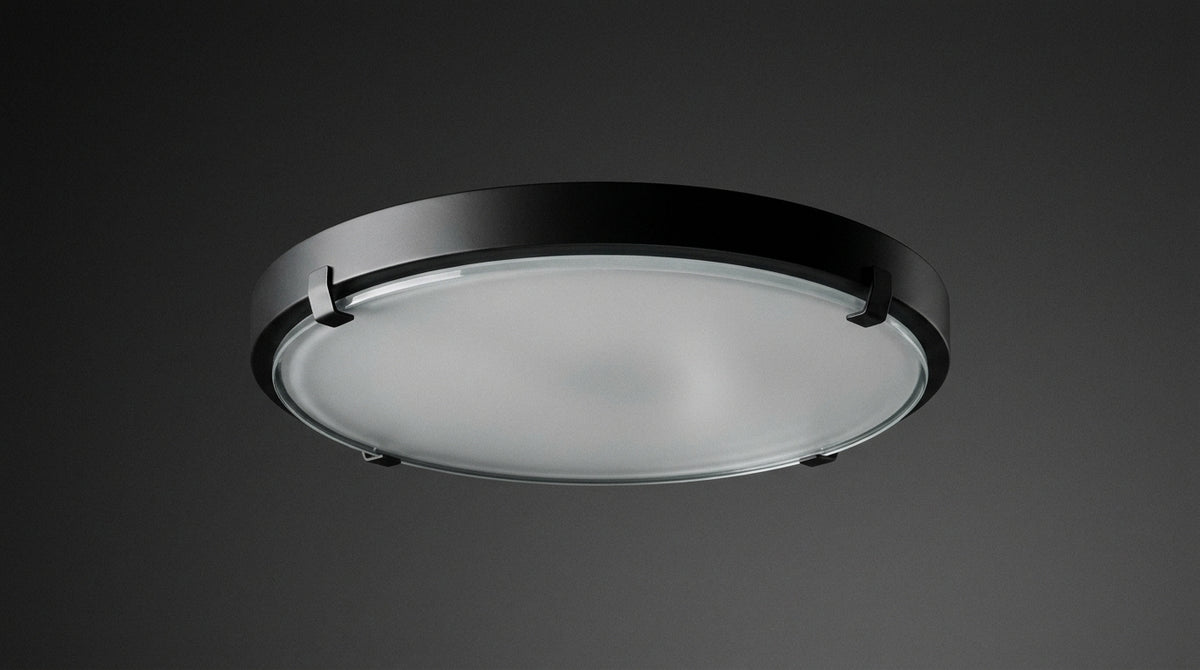
Switch off the lighting circuit breaker, then identify the fixing: a clip-on cover is released with a quarter turn, a globe is unscrewed quarter by quarter, a base plate is unscrewed with two or three screws. Never force the glass. Allow ten minutes for a surface-mounted round ceiling light.
How do you remove a round ceiling light?
First work out how the fixture is attached to the ceiling: clip-on cover, screw-on globe, screw base plate or flat LED with no moving part. Three turns of a flat screwdriver release a cover, a quarter turn is enough for a globe. The rest comes down to screws.
Our round ceiling light collection has 1,202 references as of 29 September 2026. In a sample of 75 of these product pages on the same date, 95% state a surface-mounted fitting: the base plate is screwed to the ceiling and the diffuser is removed from below.
The ceiling, the fifth wall, sets the mood of a room as much as the colour of the walls. A poorly chosen flat ceiling light dulls a living room, whereas a suitable diffuser changes the atmosphere in a single evening.
- Clip-on cover: pushed a quarter turn with a flat screwdriver, then lowered.
- Screw-on globe: comes away quarter by quarter, anticlockwise.
- Screw base plate: two or three screws, accessible once the diffuser is removed.
- Flat LED: no moving part, the base plate is unscrewed directly.
This breakdown is followed step by step in our guide to removing a ceiling light, fixing by fixing.
If the fixture is high up, mounted on a sloped ceiling or wired to an old box, have the replacement checked before refitting: ask the team for advice.
How do you remove the cover and globe from a round ceiling light?
The clip-on cover is pushed sideways with a flat screwdriver, then pulled downwards. A globe is unscrewed anticlockwise, quarter by quarter. A tinted glass shade is removed with both hands, after taking out the safety screw. None of these parts should be forced.
- Flat screwdriver: fine blade, never rested on the glass.
- Cloth: catches the cover, avoids contact with a hard floor.
- Small bowl: collects the screws, which get lost on refitting.
How do you unclip a ceiling light with a clip-on cover?
Slide the blade between the cover and the rim, twist a quarter turn, pull gently. The cover sits on two or three plastic lugs and sometimes drops suddenly: keep your free hand underneath.
The exact position of the blade depending on the model is detailed in our article on unclipping a ceiling light.
How do you remove the globe from a screw-on ceiling light?
A glass or acrylic globe is unscrewed with a quarter turn. Some models add a ring or a locking screw to remove first. In the sample of 75 references, 29% state glass as the material and 29% acrylic.
How do you remove a ceiling light with a tinted glass shade?
With two hands, never one. A large-diameter tinted glass shade is heavy and slips quickly. Place it on a cloth rather than directly on the tiles, and check the seal before putting it back.
Cut the power and label the wires before unscrewing
Switch off the lighting circuit breaker, then check that no voltage remains, with a tester or by operating the switch. Label each wire before unscrewing, by photo or with labels. The earth conductor must stay identifiable until refitting.
Should you switch off the circuit breaker and check there is no current?
Switching off is not enough, checking matters just as much. A badly labelled circuit breaker, a two-way switch wired to another circuit, and the wire stays live. Check with a tester before touching any conductor.
How do you label the wires and the DCL box?
Three conductors usually arrive: live, neutral and earth. Photograph the wiring before unscrewing, then label each wire. Our method for wiring a ceiling light covers the tightening order and the role of each colour.
- Photo: an image of the wiring before removal, taken face on.
- Labels: live, neutral and earth marked with tape.
- Tester: check before every intervention.
- Box: check that no wire is left loose.
A DCL box, that white cube on the ceiling, is recognised by its screw-on lid and its hook. The lid is removed after the central screw, then the hook releases the fixture. The rest is explained in our guide to installing a fixture on a DCL box.
Which round ceiling light should replace it?
Start from the diameter and the socket of the old one: that is what saves you from drilling again. The choice then comes down to light, material and colour. In the sample of 75 references on 29 September 2026, 72% state a modern style and 85% metal.
After removal, which round ceiling light are you looking for?
Round ceiling lights ready to replace the old one


How do you choose a round ceiling light for the room?
The living room and bedroom dominate usage, at 87% and 77% of the rooms stated in the same sample. The kitchen follows at 59%. Ceiling height and protection rating decide more often than style.
| Room | What works | What to check |
|---|---|---|
| Living room | Large diffuser, even light, dimming | Diameter relative to the room |
| Bedroom | Warm white, moderate power | Dimmer compatibility |
| Kitchen | Strong output, IP44 near the sink | Protection rating of the model |
| Bathroom | IP44, zone 2 only | Distance from the water point |
On colour, white dominates with 59% of the sample, ahead of black at 51% and gold at 23%. A light-coloured living room ceiling light absorbs less light and brightens a low ceiling.
In a bedroom, a bedroom ceiling light is chosen smaller and softer, so it does not loom over the bed when you wake up.
Near a water point, a bathroom ceiling light marked IP44 remains the only reasonable option. In the sample, only 4% of models state this protection, against 96% in IP20.
To adjust brightness by time of day, look at dimmable LED ceiling lights: 19% of the product pages sampled state that dimming is possible.
LED ceiling light or replaceable bulb: which to choose?
An integrated LED ceiling light cannot be repaired, only replaced. A model with a socket takes an E27, E14 or GU10 bulb and lasts indefinitely. In the sample, 79% of product pages state LED technology, 24% an E27 socket and 12% an E14.
| Source | What can be removed | What it means |
|---|---|---|
| Integrated LED | The diffuser only | Complete replacement if it fails |
| E27 or E14 socket | Bulb and diffuser | Bulb changed yourself |
| GU10 | Adjustable spotlights | Direction to reset after refitting |
Our selection of LED ceiling lights shows 87% with a 2-year warranty and 100% CE certification in the same sample of 75 product pages. The Designix Google listing lets you check reviews in one click if you are still undecided.
The diameter and colour of the old one remain your two reference points when changing a ceiling light. A pendant light takes over above a table when the ceiling is poorly suited to a flat model.
How do you fix a round ceiling light to the ceiling without drilling?
Reuse the holes of the old base plate: it is the only truly reliable method. A DCL box provides a fixing point without extra drilling. Adhesive hooks will not hold a fixture weighing several kilos.
The procedure is detailed in our article on fixing a ceiling fixture without drilling.
Lighting a room without a ceiling light is still possible with a wall light or a floor lamp, useful when the light point is badly placed or you want to multiply the sources.
On the same subject
In stock · shipping costs shown at checkout · up to 30% off in your cart


Ready to turn inspiration into reality?
Tell us about your room, your style and your budget, and we will show you the pieces that truly suit your project.
Get guidance in 30 seconds →