Installing ceiling spotlights: a room-by-room method
This article is also available in French: Installer des spot au plafond
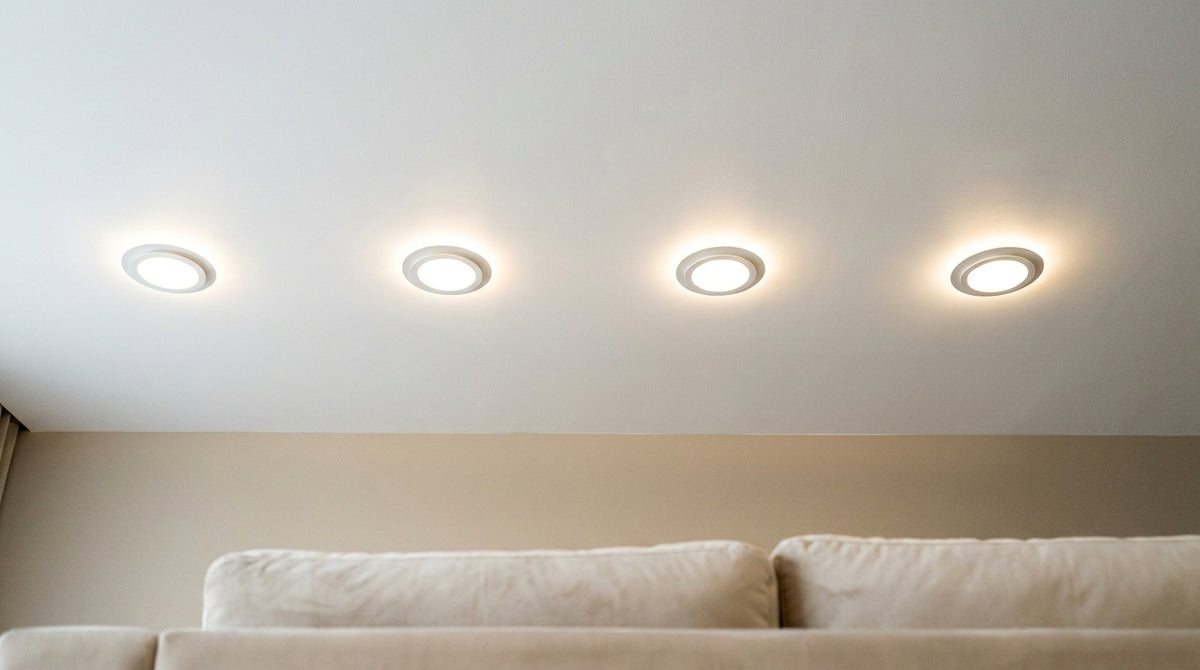
Allow one spotlight per 1.5 to 2 m², or four to six points for a 20 m² living room. Mark out the positions on the floor before drilling, then check the space available above the ceiling. That last measurement decides between recessed, surface-mounted and pendant.
How many spotlights do you need on the ceiling, and at what distance?
Spaced 80 cm to 1 m apart and set back 50 to 70 cm from the walls, spotlights cover the room without dark zones. The starting point remains one spotlight per 1.5 to 2 m². A 20 m² living room needs only four to five spotlights.
An over-lit ceiling soon tires the eye, whereas a hallway can take a higher density without discomfort. The right benchmark is not surface area alone, it is what the room has to make possible: reading, cooking, entertaining.
When the work also touches walls and floors, a turnkey living room renovation builds the lighting into the plan rather than adding it afterwards.
If the look of the fitting matters as much as its light, our lighting range brings together ceiling lights, pendants and wall lights in consistent finishes.
How do you lay out spotlights in a room?
Rows parallel to the longest wall give the most regular layout. Offset the points of one row by half a gap from the next as soon as the room is more than 4 m wide: the eye stops seeing the alignment.
- Living room: cross the beams above the coffee table, not at the geometric centre of the room.
- Kitchen: line the spotlights up on the worktop, never behind the person cooking.
- Hallway: a single regular line lights better than two rows set too close together.
- Bedroom: keep the points away from the bed and keep a low light for the evening.
To put the right figures on your plan, the article how many spotlights per m² sets out the calculation method for each surface area.
When the ceiling height moves away from the usual 2.50 m, the number of spotlights per m² has to be reviewed, often downwards.
The actual gap is set with a tape measure from the distance between spotlights marks, a checkpoint that prevents a row from closing up.
For a living room, our ceiling spotlight ideas for the living room show the most readable layouts.
Installing ceiling spotlights with glass wool: what changes
Under an insulated loft, glass wool often stays in contact with the fitting. A sealed spotlight is then needed, fitted with a hood that keeps the insulation away from the light source.
- Hood: required as soon as the insulation can sag onto the unit.
- LED: gives off less heat than halogen, which limits the risk without removing it.
- Sealing: above a bathroom, a rating suited to the zone prevents condensation inside the housing.
- Airflow: leave a gap around the housing, insulation packed against the body shortens its life.
Can you install spotlights without a false ceiling?
Yes. Surface-mounted spotlights fix directly under a slab or a floor, without losing a centimetre of height. You simply need a power supply in the right place and a suitable box. It is the simplest solution when the ceiling is low or already finished.
What are the alternatives to a false ceiling?
| Solution | What it requires | What it gives |
|---|---|---|
| Surface-mounted spotlight | A power point, no service void | Direct light, sometimes adjustable |
| Flush ceiling light | A central fixing | Diffuse light across the whole room |
| Pendant | A high point and a cable | An island of light above a table |
| Spotlight track | A rail or a base plate | Several beams to direct |
The LED ceiling light remains the most discreet answer when height is short: it presses the light against the ceiling without creating volume.
When there is no central light point, the article on lighting a room without a ceiling light explains how to work with wall and low-level sources.
If the ceiling box is already in place, installing a light on a DCL box is done without touching the wiring.
What are the drawbacks of a false ceiling?
A false ceiling costs in height what it gives in visual comfort. Below 2.50 m, every centimetre absorbed is felt immediately.
- Height: the frame and the service void reduce the perceived height, especially in an entrance.
- Access: once closed, any work on the ducts means removing a panel.
- Work: fitting a frame lengthens the job and creates dust.
- Reversibility: removing it means filling and repainting the whole surface.
Where are you going to install your spotlights, and on what type of ceiling?
How do you install ceiling spotlights, step by step?
Switch off the power at the breaker, check there is no cable or rail, drill with a hole saw at the exact diameter of the spotlight, pull the conduit from one hole to the next, then connect in parallel. An hour of marking out saves a day of redoing the work.
Fixing ceiling spotlights: marking out before drilling
Locate the joists with a detector, not by feel: a drill bit through a cable costs more than the fitting. Then mark each centre in pencil and check the alignments from the floor, the only viewpoint where an offset shows.
The recurring points to watch are listed in our guide to installing recessed spotlights in your living room, particularly on older ceilings.
Wiring ceiling spotlights: in parallel, not in series
Parallel wiring feeds each spotlight from the main point: if one fails, the others stay on. Series wiring does the opposite, and it is the most common mistake when redoing a circuit.
The full diagram for wiring spotlights in series helps you understand what not to copy, and why parallel wiring remains the rule.
If your ceiling is not suitable for drilling, you can describe your room to the team: surface area, available height, and we will point you to the simplest solution to install.
What colour temperature and wattage for spotlights?
Allow 2700 K for a living room or bedroom, 3000 K for a versatile living space and 4000 K for a kitchen or bathroom. With LED, 5 to 7 W per spotlight is enough, giving a flux of around 100 lumens per m².
Mixing two temperatures in the same room creates a yellow patch and a white patch on light walls. The choice is therefore fixed room by room, before ordering. The connection format also matters: our recessed LED spotlights cover the most common caps.
Spotlights, ceiling lights and tracks for your ceiling
 Barn 3-light ceiling light, black and gold, Premium
 Barn 3-light ceiling light, black, Premium
 Square bathroom ceiling light | Quadris
 Barn 3-light ceiling light, black
 Gearwood Grey Industrial Ceiling Light
 Barn black ceiling light
See the whole selection: Ceiling lights, Ceiling lamps and Ceiling lighting
LED ceiling spotlights: what our catalogue says
Our collection of ceiling lights, ceiling lamps and ceiling lighting has 4,772 references as of 28 September 2026. On a sample of 147 of these references on the same date, the breakdown by mounting is clear: Surface-mounted 85%, Pendant 10%, Recessed 1%. Recessed is therefore in the minority in what people actually buy today.
Another finding from the same sample: a 2-year warranty is stated on 99% of the 146 listings that give this field.
Do you need a dimmer?
A dimmer changes how a room is used: bright light for entertaining, low light for watching a film. You need a compatible bulb or module, otherwise the fitting buzzes or switches off in steps.
To decide between warm white and cool white for each room, the article white or yellow light gives the benchmarks room by room.
Related reading
In stock · shipping costs shown at checkout · up to 30% off in your cart


Ready to turn inspiration into reality?
Tell us about your room, your style and your budget, and we will show you the pieces that truly suit your project.
Get guidance in 30 seconds →