Hanging a chandelier from the ceiling: fix it, wire it, set the height
This article is also available in French: Poser lustre
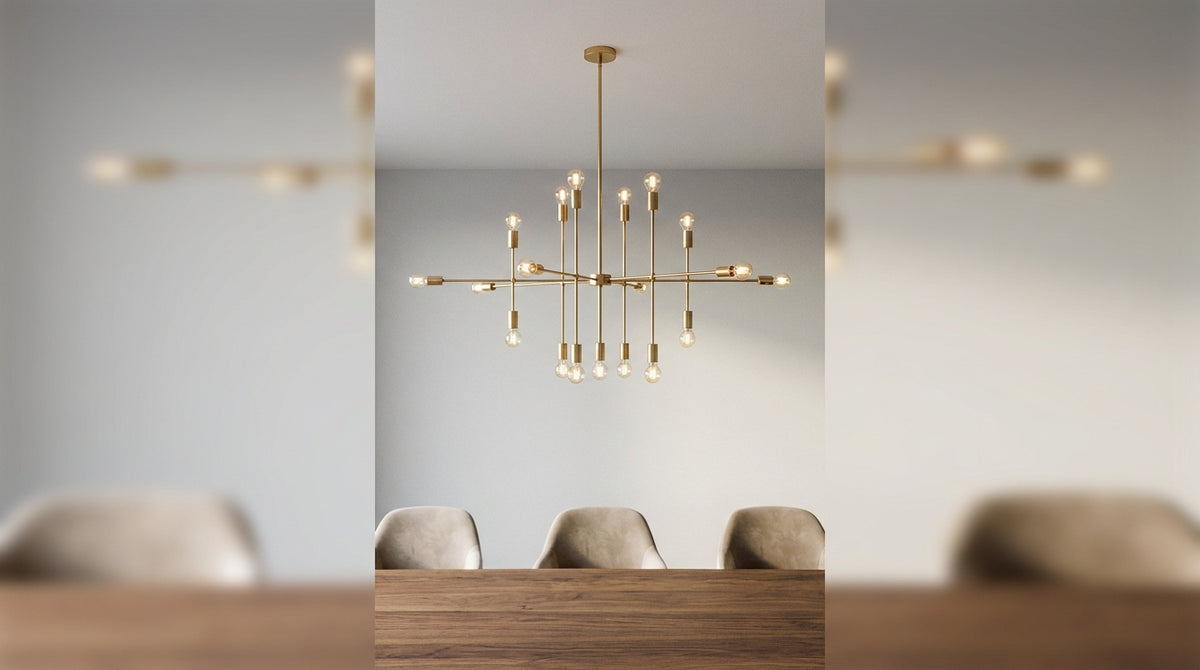
Hanging a chandelier from the ceiling: step by step to the right setting
Measure the drop before drilling: 75 to 85 cm between the bottom of the chandelier and a tabletop, and at least 2.10 m above a walkway. Then check what the ceiling can take. The final adjustment is made once the chandelier is in place, never before.
How do you fix a chandelier to the ceiling without a hook?
You can do without a hook as soon as the ceiling has a mounting plate, a crossbar or a DCL box: the fixing is then done flat in the support, with screws and plugs suited to the material. The hook is only needed for old ceilings where no mounting plate can be screwed on.
A multi-arm chandelier spreads its load over several points, a single-body piece concentrates it on one. That difference decides the fixings, well before style does.
On a DCL box, the most direct installation
The DCL box brings the current to the centre of the ceiling and takes a crossbar or a hook on a bracket already anchored to the joists. The light's mounting plate is screwed onto it, without touching the structure. For connections and markings, everything is detailed in installing a chandelier on a DCL box.
Crossbar or mounting plate: spread the load instead of hanging it
A crossbar is screwed across the box, a mounting plate is pressed against the ceiling. Both spread the effort over two or three points instead of one, which changes everything in a hollow lining. Without a box, you start again from a cable outlet hole. The hook method is still useful for old ceilings, and we covered it in fixing a chandelier to the ceiling with a hook.
- Two screws minimum, never just one, even on a light fixture
- Centre distance checked before drilling, it must match the mounting plate
- Plug chosen for the actual support: concrete, plasterboard or hollow brick
Look at the canopy already in place before drilling: it is often the only anchor point available, and a cracked canopy holds nothing. The guide which chandelier with a canopy explains how to match the model to what already exists.
What is the maximum weight of a chandelier I can fix to a plasterboard ceiling?
It all depends on the anchor, not the board. A toggle plug or a Molly plug correctly installed in 12.5 mm plasterboard holds a load that a screw alone never will. The limit on a plasterboard ceiling is not the thickness of the board, it is the type of fixing chosen.
What your fixing's label really says
Packaging states a load measured on solid concrete. In plasterboard, the useful value is lower: read the line that specifies the material, not the number written in large print.
- Toggle plug: goes through the board and bears behind it, the best option in a lining
- Molly plug: crushes behind the board, effective but sensitive to tightening torque
- Screw alone: reserved for very light fixtures
How do you fix a heavy chandelier to a plasterboard ceiling?
You get out of the board. A heavy light is taken up on the joists, on a cross rail, or on two toggle plugs that share the effort. Drilling into the wood or metal of the joist remains the safest solution when it is accessible.
On a large multi-arm chandelier, this step is not optional: weight and overhang add up.
A simple check, done before the first drill bit, tells you what the ceiling can take. It is described in the test to do before drilling.
If your ceiling is a hollow lining or the chandelier is heavy, it is better to have the fixing checked before drilling: simply write to us to have the fixing checked, and we will look at your support with you.
How do you install a ceiling light, step by step?
Three stages: switch off the power and check it, connect, then refit and tighten. Nothing else. The difficulty does not come from the actions, it comes from the order in which you do them and what you check before drilling.
The socket decides the bulb, and the bulb decides the light. Across a survey of 88 references in our catalogue as of 5 October 2026, E27 accounts for 47%, GU10 for 19%, G9 for 14% and E14 for 11%. All carry the CE mark, and 55% are guaranteed for 5 years. Enough to choose a designer light without an unpleasant surprise on arrival.
Format matters too. A cable pendant light is adjusted after installation, a ceiling light is fixed flat. This choice is made before drilling, because it changes the height of the fixing point.
Switch off, check there is no voltage, mark out
Switch off the lighting circuit at the consumer unit, then check with a voltage tester on the terminals, not just at the switch. Then mark the location: centred on the room or on the table, never lined up at random with an existing light point.
- Breaker: switch off the circuit concerned, not just the wall switch
- Voltage tester: the only proof that there is no voltage
- Detector: locates joists and conduits before the drill bit
Wiring a chandelier with three wires
Three wires, three markers: earth in green-yellow on the centre terminal, neutral in blue and live in brown, black or red on the other two. The details of special cases are in wiring a chandelier with 3 wires.
Refit, tighten without forcing
Refit the mounting plate and screw in a cross pattern. Stop when the plate is pressed flat: a screw tightened too hard in plasterboard pulls out the plug, and the whole anchor has to be redone.
Chandeliers and pendants to choose before installing


How far to lower the chandelier: the adjustment that changes everything
Allow 75 to 85 cm between the bottom of the chandelier and a tabletop, and never less than 2.10 m from the floor in a walkway. The lower the room, the shorter the drop must be. The adjustment is made with the chandelier in place, on the chain or the cable.
On a tall light, the drop is set by shortening the chain or coiling the cable, never by cutting it. The method is detailed in adjusting the drop of a chandelier.
Above a table
A dining room chandelier is centred on the tabletop, not on the room. Between the bottom of the light and the table, allow 75 to 85 cm: high enough to see your guests, low enough for the table to be properly lit.
Low ceiling, short drop: what to choose
Under a 2.40 m ceiling, a 30 cm drop leaves just 2.10 m of clearance. On a sloped ceiling, the fixing point must stay perpendicular to the slope, otherwise the light hangs crooked.
When height is lacking, a flat-mounted LED ceiling light settles the question without giving up on light.
Who installs it, and when should you call someone?
A light fixture on a solid ceiling can be installed alone, with no special tools. As soon as you need to drill into a hollow lining, create a cable outlet or rework the circuit, calling an electrician avoids having to redo the ceiling.
What you can install yourself
- Ceiling light mounted flat on an existing box
- Light chandelier on a mounting plate screwed into the joists
- Pendant on a cable with a hook already in place
When to call an electrician
Three situations are not a DIY job: a line to create, a consumer unit to modify, a ceiling whose structure nobody knows. In these cases, checking beforehand saves time and avoids an unnecessary hole.
In a renovated living room, lighting is planned before the work, room by room. Our living room lighting project starts from a survey of the ceiling and the real uses of the room. You can also visit the workshop in Vaulx-en-Velin to see the models in situation, and read customer reviews on Designix's Google Maps listing before travelling.
In stock · shipping costs shown at checkout · up to 30% off in your cart


Ready to turn inspiration into reality?
Tell us about your room, your style and your budget, and we will show you the pieces that truly suit your project.
Get guidance in 30 seconds →