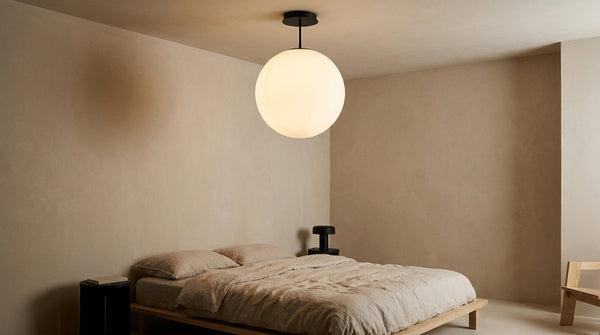
Offset pendant light: shift the light without redoing the ceiling
This article is also available in French: Suspension déportée

Measure the gap between the ceiling outlet and the centre of the furniture, then choose the offset system before the pendant itself. An offset hook covers a few tens of centimetres, a telescopic arm reaches further. Allow cable to match the offset length, otherwise the drop will never fall in the right place.
Forty centimetres of offset is enough to drop the light onto the table rather than into the walkway. The point is fixed first, the pendant is chosen afterwards: a large pendant often settles the question of volume, with 870 references as of 29 October 2026 in our catalogue.
How do you offset a pendant without redoing the wiring?
You move the fixture, not the circuit. A hook fitted plumb with the furniture takes the cable pulled from the original outlet, and the ceiling stays intact. No chasing, no switch to rework. Three families of solutions cover most cases, from the simple screw eye to the sliding kit.
The three offset systems that exist
The choice comes down to two criteria: the distance to cover and the weight of the object at the end of the cable.
- The offset hook: a screw eye fixed plumb with the furniture. The cable leaves the canopy, runs to the hook and comes back down. Discreet up to 50 cm.
- The telescopic arm: a rod fixed to the ceiling that reaches the desired point. Cleaner once the gap grows.
- The off-centre plate: a wide canopy whose cable exit is offset. Perfect for a short correction on an already painted ceiling.
- The sliding kit: a rail or articulated arm that lets you move the light after installation. The most flexible solution above a table that moves.
When a ceiling light is already in place and the gap stays modest, other setups hold up: off-centre ceiling light, 5 solutions reviews those that keep the original canopy.
How far can you offset, and what cable should you allow for
Count the real offset, the one separating the plumb line of the outlet from the plumb line of the furniture. Beyond one metre, the fixing and the cable become the weak point of the installation.
- Cable: same cross-section as the original circuit, in flexible cable. A sheathed textile cable takes on the visible run along its whole length.
- Load: the longer the offset, the more the hook works in tension. A large pendant needs anchoring in the structure, not in plaster alone.
- Total length: the extra cable is used up before the pendant. Add the two together, otherwise you will adjust the height twice.
- Visible line: 20 cm goes unnoticed, a metre gets looked at. The run becomes a line in the room, to accept or to dress.
Offset pendant in a kitchen or dining room: which system, what scale?
The technique does not change, only the scale of the offset varies. Above a table, a gap of 30 to 50 cm is almost always enough. Above an island, a metre is common. The larger the room, the more the system must disappear or be openly embraced.
Dining room: aim for the centre of the table, not the centre of the ceiling
The light must fall above the tabletop, never above the original outlet. A hook or an off-centre plate corrects an offset table without changing anything about the paint. A dining room chandelier of 60 to 80 cm in diameter properly covers six place settings.
For a longer table, a 3-lamp pendant spreads the light instead of concentrating it at one point, and absorbs a slight lateral offset better.
Kitchen: the offset above the island
The worktop rarely falls under the ceiling outlet, especially in an L-shaped or central-island kitchen. A one-metre offset is then nothing surprising.
- Central island: favour a rigid arm, the cable stretched over that length ends up showing.
- L-shaped worktop: two offset points are better than one recentred, the work area stays lit along its whole length.
- Height: a kitchen chandelier placed 75 cm from the worktop lights the hands without dazzling the eyes.
Living room and bedroom: when an offset is not the right answer
Above a coffee table, the offset is still justified. Above a bed or a sofa, it often puts the light in the walking axis, at forehead height. A floor or wall fixture solves the problem better.
If the offset remains the only option, treat it as an object: a well-proportioned pendant chandelier is acceptable above a reading corner, provided you keep 2 m under the shade.
Where should the light fall, and what is blocking it today?
Pendants to look at before fixing the light point


What height for an offset pendant, and how do you adjust it?
The offset does not change the installation height, it changes the measuring reference. You no longer start from the canopy but from the furniture: allow 75 to 85 cm between the bottom of the shade and a tabletop. The drop is adjusted from the floor, never from the ceiling.
Adjusting the drop when the canopy is no longer above the furniture
Measure on the floor, vertically below the furniture, then transfer to the cable once the pendant is hung. A height-adjustable pendant avoids cutting the cable too short on the first try.
| Use | Drop above the furniture |
|---|---|
| Dining table | 75 to 85 cm above the tabletop |
| Island or worktop | 75 to 85 cm above the worktop |
| Living room coffee table | 100 to 120 cm above the tabletop |
| Bedside table | 50 to 60 cm above the tabletop |
Colour temperature and bulb: what changes once the light has moved
Offsetting a point brings it closer to the eye: the colour of the source matters more. Aim for 2700 K above a table, a warm white that flatters faces and materials. 3000 K suits a work island better.
- Socket: out of a survey of 246 pendants in our catalogue as of 29 October 2026, 35% have an integrated LED, 27% an E27 socket, 21% G9 and 9% GU10.
- Warm source: 2700K bulbs keep the mood of a dining room without turning yellow.
- Dimming: an offset pendant above a table is often dimmable, to go from dinner to evening.
- Damp room: 98% of the same survey is IP20, so out of reach for a bathroom.
If your ceiling outlet falls beside the furniture and you are unsure between a hook, a telescopic arm and an off-centre plate, describe the room to us and we will tell you what to fit: talking to an adviser about your project takes two minutes.
How do you secure a pendant to the ceiling, including on a slope?
The hold depends on the structure, not on the pendant model. A hook in concrete or in a joist lasts for years, the same hook in a hollow slab or in plaster alone eventually gives way. Identify the nature of the ceiling before drilling, and choose the plug accordingly.
Hook, canopy or DCL box: choosing the anchoring point
Three anchoring points are found, and each answers a specific situation.
| Anchoring | When to choose it |
|---|---|
| Hook | Offset to create, solid ceiling, light to medium pendant |
| Canopy | Existing outlet, short gap, ceiling already finished |
| DCL box | Equipped outlet, clean connection without visible terminal blocks |
Connecting to an already equipped outlet needs no special tool: pendant on a DCL box details the wiring step by step.
Sloped ceiling and great height: the cases that go wrong
A slope shifts the plumb line by several centimetres over the drop height, and a great height makes the hook unreachable once the pendant is installed.
- Slope: the hook must stay perpendicular to the floor, not to the ceiling, otherwise the pendant hangs crooked. See sloped ceiling for setups that correct the angle.
- Great height: plan a mast or a telescopic pole for maintenance, and a cable longer than needed.
- Hollow ceiling: go through to the joist or fit a backing plate, plasterboard alone will not hold a heavy pendant.
- Warranty: 55% of the listings in the survey state 5 years, a useful clue when the installation is permanent.
When two systems are technically equal, feedback from other buyers helps decide: the Designix Google listing gathers verifiable reviews.
In stock · shipping costs shown at checkout · up to 30% off in your cart


Ready to turn inspiration into reality?
Tell us about your room, your style and your budget, and we will show you the pieces that truly suit your project.
Get guidance in 30 seconds →