Changing an integrated LED bulb: repair or replace?
This article is also available in French: COMMENT CHANGER UNE AMPOULE LED INTÉGRÉE ?

Switch off the circuit breaker, remove the diffuser, then look at the light source: a module screwed or clipped onto a plate can be replaced, a module soldered to the body of the fixture cannot. Also check the driver: it is the part that fails most often.
Is it possible to change an integrated LED bulb?
Yes, when the source is a module screwed or clipped onto a plate: it can be removed and replaced. No, when the LED is soldered to the body of the fixture: no socket, no spare part, the whole fixture has to be changed. The test takes one move: unplug the source and look at the connector.
The vocabulary is misleading. A bulb unscrews, an integrated module does not. The simplest solution is to keep two or three LED bulbs in the formats already used around the home in advance.
What is an integrated LED, and why doesn't it unscrew?
An integrated LED is a diode soldered onto a plate, protected by a diffuser, powered by a driver housed in the fixture. Nothing turns, nothing unscrews: there is no socket, so no movement is possible.
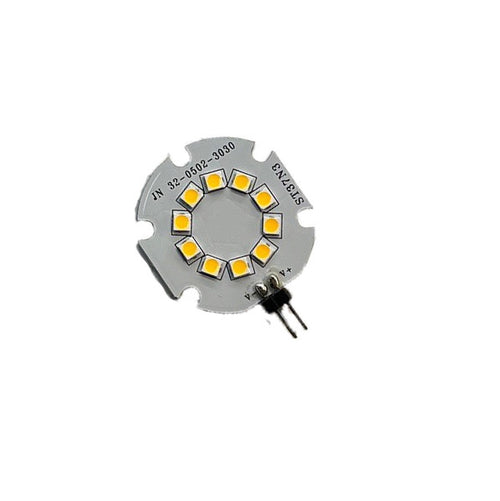
On a large pendant or a ceiling light, the source often takes the form of a linear module, a COB LED whose length is specific to the model.
The driver fails more often than the LED
A diode lasts a very long time, the power supply gives out before it does. The driver converts the 230 V from the mains into low-voltage direct current, and it is the part that heats up, whines or makes the light flicker. Knowing how an LED works stops you condemning the source too quickly.
Two signs point to the driver: regular flickering, an intensity that drops after a few minutes. A flickering LED lamp should be diagnosed before any dismantling.
- Clipped module: removable, sometimes available as a spare part.
- Module screwed onto a plate: two screws and a connector to unplug.
- Soldered module: no spare part, the source is one with the fixture.
How do you change an integrated LED bulb without a bezel?
Place your hand flat on the rim of the diffuser and turn it a quarter turn. If it does not turn, it is clipped: lift one side, then the other. The bezel has not disappeared, it is hidden under a seal or behind the glass.
Identify the fixing method: clips, quarter turn or hidden screws
- Quarter turn: two lugs under the edge, a slight play before it unclips.
- Clips: the diffuser lifts on one side then the other, never both at once.
- Hidden screws: three thin screws under the peripheral seal, to remove before pulling.
On pendant lights, the bezel often unscrews by hand, without tools.
When nothing is visible, the spotlight without a bezel opens around the rim, by slightly pinching the glass.
Three steps not to miss: power off, cold dismantling, pressure on the rim
- Power off at the circuit breaker, not just at the switch.
- Cold dismantling: the driver heats up more than the diode, wait a few minutes.
- Pressure on the rim: never on the module, nor on the soldered edge.
How do you remove a recessed LED spotlight?
Push the two fixing springs upwards, one side after the other, then lower the spotlight from the front. The driver stays attached behind the socket, connected by a connector: unplug it before pulling on the cable. Note the orientation of the springs for reassembly.
Fixing springs: from the ceiling or from the front
From the loft or a removable false ceiling, you press on the tabs from behind and the spotlight drops into your hand. From the front, you slide two fingers on each side of the ring, pinch the springs against the body and lower it gently.
The step is the same for changing the bulb of a recessed spotlight with a GU10 or GX53 socket.
The driver stays suspended behind the socket
On a recessed spotlight, the power supply is set back in the ceiling, away from the hole. It is held by a simple connector. Cut the power, unplug, then note the output voltage shown on the label before looking for a replacement power supply.
When repairing is no longer worth it
When the module is soldered with no spare part, or when the fixture is sealed, there is nothing to replace: no bulb, no accessible driver. You change the fixture. This is the case for LED blocks moulded into a diffuser and for most waterproof bathroom models.
| Situation | What you replace | Why |
|---|---|---|
| Screwed or clipped module | The source alone | The connector and screws make the module removable. |
| Accessible driver | The power supply alone | The failure comes from the block, not the diodes. |
| Soldered module or sealed fixture | The complete fixture | No spare part exists. |
Soldered module with no spare part
A soldered module sits on a plate glued or riveted to the body. Replacing it means desoldering and finding an identical reference in voltage and size. Without a spare part supplied by the manufacturer, the operation costs more than a new fixture. Our comparison repairing or changing an integrated LED fixture details the cases where repair still works.
Sealed fixture or IP44 bathroom model
An LED block moulded into a waterproof diffuser does not open. The IP44 protection rating requires a closed enclosure, hence an inaccessible source. In a bathroom, this choice costs you on the day of the breakdown.
When the module is soldered and no spare part exists, the right question becomes the next fixture. Give the desired socket, the room and the ceiling height: you can ask our team before ordering.
Your integrated LED has failed: what do you start again with?
Which fixture to choose so the bulb can be replaced
Choose a fixture whose listing mentions a socket: E27, E14 or GU10. The source becomes an everyday part, sold individually. It is the criterion that saves you from changing everything at the next flicker, and our guide to E27, E14 and GU10 socket sizes helps you read a listing in thirty seconds.
The sockets you find everywhere
From a survey of 33 bulb references in our catalogue as of 29 September 2026, the E27 socket accounts for 42% of the survey, G9 for 27%, G4 for 24% and E14 for 15%. The LED Bulbs collection has 266 references on the same date.
E27 socket bulbs fit pendants and table lamps.
For adjustable spotlights, GU10 LED bulbs are replaced without tools. G9 and G4 socket bulbs are used for wall lights and compact light points.
Same survey, on the warranty side: 73% of references are covered for 2 years and 27% for 5 years. Enough to absorb the next breakdown.
Check the product listing before buying
- Socket: E27, E14, G9 or GU10, stated in black and white.
- Bulb included or not: a fixture delivered without a source is often the best sign.
- Warranty: 2 years on 73% of the survey, 5 years on 27%.
- Protection rating: IP20 on the bulbs in the survey, kept away from water splashes.
Glass fixtures spread a soft light and let you see the source, and therefore change it.
If you are hesitating between two models, our advice on composing a lighting scheme starts from how each room is used: dining, reading, hallway.
Screw-in LED bulbs: the selection that avoids the next breakdown


On the same subject
In stock · shipping costs shown at checkout · up to 30% off in your cart


Ready to turn inspiration into reality?
Tell us about your room, your style and your budget, and we will show you the pieces that truly suit your project.
Get guidance in 30 seconds →