Installing a ceiling spotlight: the method that avoids mistakes
This article is also available in French: Poser un spot au plafond
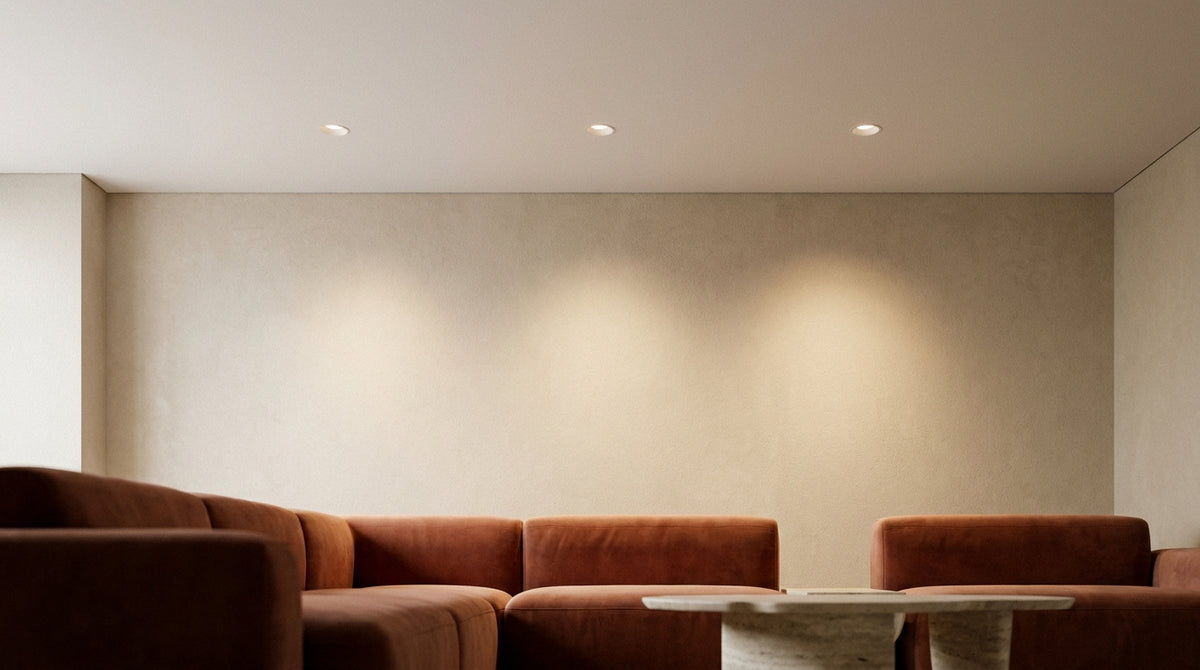
Space your spotlights 80 cm to 1 m apart on a regular grid, and keep 50 cm between the first point and the wall. Before drilling, check the void above the ceiling and the depth of the fixture. The number follows the surface area: allow one point for roughly 2 m².
How many ceiling spotlights, and at what distance should they be placed?
Allow one spotlight for roughly 2 m², spaced 80 cm to 1 m apart and set 50 cm from the walls. In a living room, two or three parallel lines are enough. The grid matters more than the quantity: eight aligned points light better than twelve placed at random.
This layout is settled before buying, during a living room renovation project, while the ceiling is still accessible and the cables can be run without repainting.
What distance should be used when placing ceiling spotlights?
The gap between two points is roughly half the distance between the ceiling and the surface to be lit. Below 2.50 m of height, that gives 80 cm to 1 m. Wider, the light leaves dark holes; tighter, it multiplies shadows. The cases for each room are detailed in our article on the distance between ceiling spotlights.
How should ceiling spotlights be distributed?
First distribute the lines, then the points on each line. A rectangular room is treated as a grid parallel to the long walls, with an identical setback on each side.
| Room | Grid between spotlights | Distance to wall |
|---|---|---|
| Living room, lounge | 80 cm to 1 m | 50 cm |
| Kitchen | 60 to 80 cm | 30 to 40 cm from the worktop |
| Hallway | 1 m to 1.20 m | 40 cm |
| Bedroom | 80 cm to 1 m | 40 to 50 cm |
If you prefer to confirm the grid and the number of spotlights before drilling, describing your room is often enough to avoid a badly placed row. You can talk about your project with the team with a simple hand-drawn plan.
What is the ideal spotlight layout in a living room?
Align the spotlights on the axes of the room, not on the furniture. Two lines parallel to the long walls, plus one point above the coffee table, give a wrapped living room without a grid effect. The sofa is then read by contrast, never by glare.
- Two lines parallel to the long walls for a narrow living room
- Three lines for a wide room, with one point centred on the coffee table
- The corners stay in shadow: a wall light handles that better than a spotlight
How many spotlights should be installed for a 40 m² room?
For 40 m², allow around twenty points at one spotlight per 2 m², spread over three or four lines. The total drops if a pendant or a floor lamp already provides light. Our article on the number of spotlights per m² details the calculation room by room.
How do you choose the number of spotlights to put on the ceiling?
Start from the use, not from the ceiling. A reading room needs more points than a hallway, and a worktop calls for directed lighting rather than a wide grid. A few ceiling spotlight ideas for the living room show the layout zone by zone.
When the layout hesitates between two options, comparing completed projects helps: the Google listing of the business gives an overview of installed projects.
A useful commercial reference point: the living room ceiling light provides the central point that a grid of spotlights does not replace, especially above a coffee table.
Recessed, surface-mounted or adjustable spotlight: what to choose for each room?
Surface-mounted when the ceiling is low, concrete or already finished, recessed when the height allows cutting in and the fixture must disappear, adjustable where a wall or worktop needs to be targeted. The type is chosen before the finish, never after the cut-out.
| Type | What it gives | What to check |
|---|---|---|
| Surface-mounted | A ceiling that is accepted as is, quick installation | The visible height and the colour |
| Recessed | A clean ceiling, the source erased | The void and the cut-out diameter |
| Adjustable | Targeted, modifiable lighting | The angle and the risk of glare |
From a survey of 147 ceiling light references in our catalogue as of 28 September 2026, 85 % are surface-mounted, 10 % are pendant and 1 % are recessed. The 2-year warranty is declared on 99 % of this survey. The catalogue has 4,772 references on the same date, enough to find a specific shape or colour when it is missing elsewhere.
How do you install a recessed ceiling spotlight?
Mark, cut, clip. The void above the ceiling must accommodate the body of the spotlight: a few centimetres for a flat module, more for a model with a socket. The cut-out follows the diameter given by the manufacturer. Our guide to installing ceiling spotlights goes through the steps in order.
Installing ceiling spotlights in a bathroom: what changes
Proximity to water makes the protection rating the priority over style: IP44 minimum around the bathtub and shower, IP20 elsewhere. An adjustable model there is mainly used to light the mirror. Adjustable spotlights with a socket accept a replaceable bulb, a real advantage in this type of room.
The choice of source matters as much as the housing: LED spotlights are installed without a separate transformer in most cases.
Spotlights and ceiling lights ready to install on the ceiling
 Barn 3-light ceiling light, black and gold, Premium
 Barn 3-light ceiling light, black, Premium
 Square bathroom ceiling light | Quadris
 Barn 3-light ceiling light, black
 Gearwood Grey Industrial Ceiling Light
 Barn black ceiling light
See the whole selection: Ceiling light, Ceiling Lamp and Ceiling Lighting
Which ceiling spotlight for your room?
What are the standards for installing a ceiling spotlight?
A dry room is fine with IP20, a wet area requires IP44 minimum. The CE marking, the manufacturer's instructions and the circuit breaker switched off before any work form the basis. The rest depends on the chosen fixture, and its instructions decide.
- IP20 for a dry room
- IP44 in the wet area, around the bathtub or shower
- CE marking on the fixture
- Manufacturer's instructions for the cover and the connection
- Circuit breaker off before any work
Is a recessed spotlight cover mandatory?
Not everywhere. The cover protects the material located just above the spotlight, insulation or a wooden support. It becomes necessary when the fixture heats up or when the ceiling is insulated. The simplest approach is to read the instructions: they state whether the cover is supplied, recommended or unnecessary.
What are the standards for putting a light on the ceiling?
Three points frame a project: a protection rating suited to the room, a fixture marked CE, a connection in accordance with the instructions. From the survey of 147 ceiling light references in our catalogue as of 28 September 2026, 97 % are IP20, 2 % are IP44, and 99 % carry the CE marking.
On a project supervised by an electrician, ordering is better handled through a single contact: the trade and partner space is used to coordinate fixture and furniture together.
For a spotlight with a socket, the reference matters when replacing it: GU10 LED bulbs exist in warm white as well as cool white, which corrects a colour without changing the fixture.
When the source is integrated, this calculation disappears: an LED ceiling light is chosen on the shape, the diffusion and the light colour.
How do you move from a ceiling that lights to a ceiling that dresses the room?
The spotlight handles the use, the decorative fixture signs the room. Once the grid is set, the colour temperature and the ceiling finish decide the atmosphere. It is this last adjustment that separates a technical ceiling from a lived-in ceiling.
In a living room, a pendant light above the table, completed by two wall lights, is often enough to finish the layout without overloading the ceiling.
Which colour temperature should be chosen for a ceiling spotlight?
Stay at 2700 K for a living room or bedroom, move to 3000 K for a kitchen or office, and reserve 4000 K for work rooms. A single temperature per room avoids areas that lean yellow next to areas that lean blue. Our article on white or yellow light helps decide according to use.
From the survey of 147 ceiling light references as of 28 September 2026, 53 % carry the LED mention: consumption is no longer the selection criterion, the quality of diffusion has become one.
Fixing a ceiling spotlight: the process, from marking to the final adjustment
- Draw the axes and the gap between points in pencil
- Check each point with a detector before drilling
- Switch off the circuit breaker, then drill in the order of the layout
- Adjust orientation and light intensity with the light on, once the room is furnished
The result is better judged from project photos than from a product sheet: the Designix customer reviews show the light as it arrives in people's homes.
On the same subject
In stock · shipping costs shown at checkout · up to 30% off in your cart


Ready to turn inspiration into reality?
Tell us about your room, your style and your budget, and we will show you the pieces that truly suit your project.
Get guidance in 30 seconds →