Does an LED tube need a starter? The clear answer
This article is also available in French: Faut il un starter pour un tube led
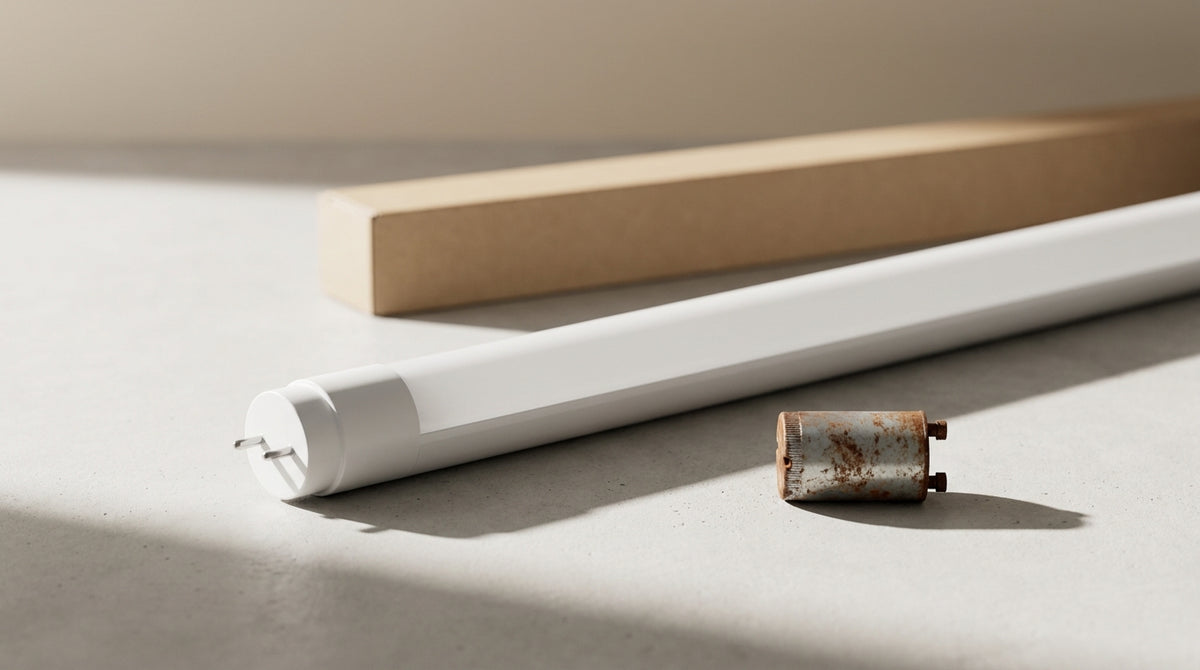
Remove the starter: an LED tube does not need one. The starter only serves the neon tube, where it initiates the discharge in the fluorescent tube, attempt after attempt. On an LED tube powered at 230 V, it becomes useless and sometimes makes the whole thing flicker. What remains is to check whether your tube accepts the existing ballast or whether it must be removed.
Does an LED tube need a starter?
No. An LED tube runs on the 230 V mains supply and handles its own ignition internally. The starter has nothing left to control, so it is removed. On most models sold today, the ballast must also be taken out of the circuit.
If the fixture is old and the light disappoints you, the real question becomes: replace the tube or start over with a complete light fixture? The second option saves you from tinkering with a fixture whose look you stopped liking a long time ago.
How does a neon starter work?
The starter is a thermal switch housed in a small casing. At startup, its bimetallic strip heats up, lets current flow through the tube filaments, then opens suddenly. That break creates the overvoltage that ignites the gas. None of this exists in an LED tube: no gas to ionize, no preheating. Understanding this cycle helps you replace a neon starter without picking the wrong part.
Where is the starter on a neon tube?
Look for a small cylinder at one end of the tube, never in the middle.
- End of the tube: next to one of the two caps
- 3 to 4 cm cylinder: white, grey or black depending on the model
- Under the cover: remove it before concluding there is none
On some fixtures fitted with an electronic ballast, there is no starter at all. See how to change a neon starter when one is clearly present.
Once the fixture is open, note the length, diameter and cap of the tube in place. The LED lighting collection is easier to browse with these three references in mind, and you will mainly find fixtures ready to install when retrofitting is no longer worth the effort.
How do you wire an LED neon tube without a starter?
Switch off at the breaker, remove the tube then the starter. Then power the tube holder directly at 230 V: live and neutral arrive on one side, the other side stays free or receives the jumper wire depending on the model. The tube does the rest.
Direct wiring on 230 V
The principle is simpler than with a neon tube: no filament to preheat, so no need for the second circuit. Check that the chosen tube is indeed a direct 230 V model and not a ballast-compatible one. A multimeter on the terminals before reconnecting avoids nasty surprises, and the article on how an LED works details what happens on the power supply side.
The ballast: remove it or not?
| Element | Classic neon | Ballast-compatible LED tube | Direct 230 V LED tube |
|---|---|---|---|
| Starter | Mandatory | To be removed | To be removed |
| Ballast | Required | Retained | To be removed or bypassed |
| Power supply | 230 V via ballast | 230 V via ballast | Direct 230 V |
On an old fixture, both the magnetic ballast and the electronic ballast are removed before switching to direct wiring. The first heats up and hums, the second complicates diagnosis as it ages. The rewiring details depending on the model are described in our guide on the fluorescent tube, neon and the electronic ballast.
Across an entire premises, the method is repeated and identifying the wires becomes the real issue. Our professional space gathers what you need to equip several workstations without spending the whole day on it.
How can I replace a fluorescent tube with an LED tube?
Note the length, diameter and cap of the tube in place, then compare with the label on the box. The LED tube must show the same cap, G13 for a 26 mm T8, and above all the right power supply mention. The rest comes down to two steps: starter removed, ballast handled.
The whole procedure is detailed in our guide to replacing a fluorescent tube, from removal to first switch-on.
Reading the mention on the box
Two families coexist and they are not interchangeable.
- Ballast-compatible: works with the ballast in place, starter removed
- Direct 230 V: requires removing the ballast and sometimes a bypass
- Cap: G13 on a 26 mm T8, G5 on a 16 mm T5, no exchange possible
Wording varies from one manufacturer to another. To replace a neon tube with an LED tube, rely on the stated voltage, not the drawing on the packaging.
Why is an LED neon tube not working?
A new tube that stays off or flickers almost always has a simple cause.
- Tube side: ballast-compatible model fitted on a circuit without a ballast, or a 230 V tube left behind a ballast
- Fixture side: starter still in place, loose wire, oxidized socket
- Power supply side: tripped breaker, dimmer incompatible with the tube
Slow flickering points to a forgotten starter, total silence points to the power supply or the contact.
LED tubes and linear fixtures to replace a neon tube


Before ordering anything, have your setup checked: a message with a photo of your fixture is enough to know whether you keep the old one or go for a new one. Send us your setup, the answer is quick and saves you a return shipment.
Is it possible to connect an LED tube to any light fixture?
No, two measurements decide for you. The tube must match the length, diameter and cap of the old one, otherwise it will not fit into the sockets. It must also match the fixture's power supply: ballast-compatible or direct 230 V. Color temperature and protection rating are chosen afterwards, depending on the room.
Length and diameter to match
A T8 measures 26 mm in diameter and clips onto a G13 cap. A T5 measures 16 mm and uses a G5. Lengths of 60, 90, 120 and 150 cm are not interchangeable, and a tube that is too short leaves the sockets exposed. Note these three values before searching, the box always shows them.
Color temperature and protection rating
A 2700 K warms, a 4000 K stays neutral above a worktop, a 6000 K leans blue. For humidity, an IP20 is enough in a dry room, an IP65 is required in a pantry or under a canopy. In these rooms, a suitable kitchen light fixture saves you from rewiring twice.
Which fixture to choose if you replace everything?
First choose what the room must do, the technical sheet comes after. Above an island, a kitchen pendant brings the light down onto the worktop instead of spreading it across the ceiling.
Above a table, the dining room lighting selection gathers pendants whose installation height suits a meal.
In a garage, a workshop or a pantry, an IP65 LED ceiling light lights straight down and withstands damp air.
On a survey of 250 references from our LED Lighting collection as of September 29, 2026, the 2-year warranty and CE certification are declared on 100% of the survey. This collection counts 18,269 references on the same date, enough to replace a tube with a complete fixture rather than a tube to retrofit.
Reviews left on our products can be verified with one click on the Designix Google listing.
And if the topic goes beyond this single neon tube, switching to all-LED can be planned room by room, without going back through a starter.
Which case are you in, exactly?
In stock · shipping costs shown at checkout · up to 30% off in your cart


Ready to turn inspiration into reality?
Tell us about your room, your style and your budget, and we will show you the pieces that truly suit your project.
Get guidance in 30 seconds →