220V Outdoor LED Strips
This selection is also available in our French store: Rubans LED d exterieur 220V
No products in this selection.
- Tracked delivery to your country Tracked delivery
- Secure payment at checkout Multiple payment methods
- 14 days to change your mind 14-day returns
- Secure payment Secure payment
Not sure of your style? Find it in 30 seconds
A few questions, and we will show you the pieces made for you.
Frequently asked questions
How do I choose the right product?
What are the delivery times?
Can I return an item?
Can I pay in instalments?
An interior that reflects who you are
Carefully selected pieces, shipped from our warehouses. Our team advises you before you buy, so you choose with confidence.
- Tracked delivery
- Pay in instalments, where available
- 14 days to change your mind
- Advice & showroom in Lyon, France
A 220V outdoor LED strip connects directly to the mains, with no transformer to house on a facade or under a canopy. Choose a sheathed, cuttable strip in the colour temperature that suits stone, wood or a path, then entrust the mains connection to a qualified installer.
What is a 220V outdoor LED strip?
The 220V LED strip runs on 230 V and needs no transformer: the flexible sheath around it protects the components from splashes, and the connectors sit inside a waterproof box. It is installed when you want a continuous line on a facade, under a canopy or along a terrace, with no visible housing.
Does a 220V LED strip need a transformer?
No. The 220V strip runs straight from the mains, whereas a 12V or 24V strip depends on a low-voltage driver that must be housed under cover, often far from the line. This difference matters outdoors, where space is short under a canopy or in a facade box. Low-voltage versions remain useful when a driver is already planned: see the 24V low-voltage versions.
220V or 24V outdoor LED strip: what is the difference when installing?
In 220V, there is a single line to run, a single protected connection point, and the length available per run is stated on the model's data sheet. In 24V, you must add the driver's location, voltage drop over long lengths and one more box to hide. 220V simplifies installation on a facade and on a hard-to-reach wall; the range of 220V LED strips gathers the relevant models.
Where to install a 220V outdoor LED strip?
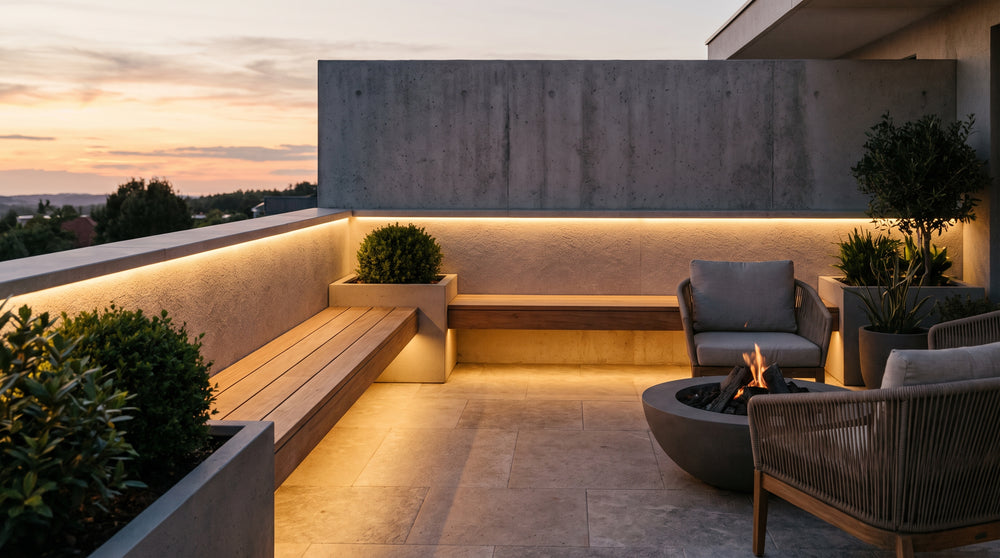
On a facade, under a canopy, along a terrace or a path, the strip is fixed flat, sheltered from direct runoff, and the junctions lead into a waterproof box. Check the stated protection rating against the wall's actual exposure before sticking anything down. Outdoors, aim for IP65 under a canopy and IP68 in direct exposure; for custom 220V lengths, contact Designix customer service.
Under a canopy or pergola
The area is sheltered from driving rain but not from damp: a sheathed strip holds up well there, provided the surface is dry and dust-free when bonding. Aim for the purlin or joist, never the face exposed to the prevailing wind. The waterproof models for exposed outdoor use are used when splashes reach the area.
Along a terrace edge and a path
On the ground or on a step nosing, the strip becomes a circulation marker: you need a reinforced sheath, mechanical fixings rather than adhesive, and a water path that does not pool on the profile. Near a pond, keep the line low and choose a version designed for damp conditions, such as lighting for pool surroundings.
| Location | What you want | What to check on the data sheet | Point of caution |
|---|---|---|---|
| Facade or exposed wall | continuous line, grazing light | protection rating suited to exposure | protected connectors and ends |
| Under a canopy, covered terrace | discreet, continuous ambience | sheath, available length, colour temperature | clean, dry surface before bonding |
| Open terrace, path | marking along an edge or on the ground | reinforced sheath, mechanical fixings | runoff and standing water |
| Pool surroundings | low light, no glare | version designed for damp outdoor use | distance to swimming areas |
| Conservatory, outdoor lounge | warm accent light | 2700 K to 3000 K, 220V supply | cable routing and nearby socket |
What light for outdoors: warm white, neutral white or colours?
Colour temperature sets the mood. A warm white between 2700 and 3000 K warms a stone facade or a wooden terrace, a neutral white around 4000 K lights a path clearly, and an RGB strip changes the mood through the evening.
Warm white 2700 K or 3000 K: which for a facade?
2700 K leans towards the light of a filament bulb: it flatters stone, brick and woodwork, and pairs well with warm interior lighting. 3000 K stays warm but renders colours more accurately and details more legibly, which suits a terrace where people sit. For a very warm result, see the very warm light of 2700K; for a legible compromise, a warm white result in 3000K.
RGB strip: what else to plan for
A colour strip adds a controller and a remote within reach, housed somewhere accessible and protected. It serves a changing mood, not functional lighting: to light properly, a dedicated white remains necessary. So allow for a four-channel model, see RGBW strips with dedicated white, rather than a plain RGB for a terrace used in the evening.
| Result | Temperature | Mood | Where to use it |
|---|---|---|---|
| Very warm white | 2700 K | warm, close to halogen | stone, wood, residential facade |
| Warm white | 3000 K | soft and legible | terrace, canopy, outdoor lounge |
| Neutral white | 4000 K | crisp, functional | path, stairs, circulation area |
| Colours | RGB or RGBW | varies with the moment | party terrace, garden |
Cuttable LED strip: how does it work?
A cuttable strip has marks printed on its sheath: cut only at these marks, which delimit a complete group of LEDs. The spacing between marks depends on the model and is given on the data sheet. A separated section cannot be connected to the rest, so adapt the length before installation.
Locate the cut points before measuring
Unroll the strip flat over the actual length, mark the start and end, then find the nearest cut mark while staying within the measurement. Cutting between two marks leaves an incomplete group that will not light. LED strips by use differ precisely in their lengths and marks, to be read data sheet by data sheet.
Can an already cut strip be extended?
No, not by joining it end to end reliably outdoors. The maximum length per run is given by the manufacturer: beyond that, use an additional power supply rather than stacking sections. So measure twice, add the corner returns, and keep a small margin at the ends for the connectors.
How to install and connect a 220V outdoor LED strip?
Installation starts with a clean surface and a straight line: profile, clips or reinforced adhesive depending on the model. The 230 V connection is made with the power off, in a protected junction box with a cable gland; it is a job for a qualified installer, as with any work on an outdoor circuit.
Fixing straight: profile, clips or adhesive
An aluminium profile protects the sheath, diffuses the light and evens out small wall defects: it is the safe choice on render or irregular stone. Mechanical clips hold on a rough or damp surface, where adhesive fails at the first frost. Reinforced adhesive is enough on a smooth, clean and perfectly dry surface.
Connecting to the mains safely: what is down to the installer
The link to the outdoor network, circuit protection and waterproof junctions require a professional's hand. In preparation, you can clear the cable route, position the box under cover, provide the cable gland and leave the strip unconnected. The rest is confirmed once the assembly is closed.
LED strip, LED wall light or LED ceiling light: which to choose outdoors?
A strip draws a continuous line and highlights architecture; an LED wall light or LED ceiling light illuminates a specific area, an entrance, a canopy, an outdoor lounge. On an open terrace, the strip suits the ambience and the wall light suits the passage: the two complement each other more than they replace each other.
LED lighting on a canopy ceiling: which fixture?
Under a canopy, you need to see what you are doing: set down a glass, look for keys, read. An LED ceiling light or wall light directs light down onto the work surface, where a strip stuck at the top of the wall gives only grazing light. The Designix lighting catalogue gathers these families, to compare with the strip according to the area to cover.
Complementing a strip with a facade wall light
The most legible combination: a wall light near the door for the passage, a strip in a low line for ambience. Both on the same control saves switching on three switches when you come home. For an outdoor lounge or a conservatory, LED strips for the living room give power levels suited to seated use, and all our lighting for home and outdoors complete the set.
How to maintain an outdoor LED strip and judge the budget?
Maintenance is limited to dusting the sheath with clean water and checking, before each season, the condition of the connectors and fixings. On budget, the most accessible models are simple white strips; COB, RGBW or reinforced-sheath versions sit higher in the range.
Cleaning and checks before winter
A damp cloth, never a direct jet or abrasive product on the sheath. Then check the clips, the ends and the tightness of the cable gland, and remove leaves and debris accumulated on the profile: a blocked water outlet eventually lets damp in. A well-fixed, well-sealed strip goes through the seasons without intervention.
Entry level or durable model: where the gap lies
The price gap comes down to three points: the sheath (flexible or reinforced silicone), the LED type (simple or COB for a line without dots) and the presence of a dedicated white in colour versions. An accessible strip suits an ambience line under a canopy; a highly exposed facade justifies a sturdier sheath and mechanical fixings.
To choose, count the linear metres to cover: an ambience line highlights a terrace, an additional fixture lights the passages. To equip a whole terrace, start with the ambience line, then complete with the strips that work without a transformer and a passage light.
Frequently asked questions about 220V outdoor LED strips
How many metres of LED strip should I plan for a terrace?
Measure the linear metres to cover, add the corner returns and keep a margin at the ends for the connectors. The maximum length per run is given on the model's data sheet: beyond that, plan an additional power supply rather than connecting in series.
Can a 220V LED strip be left outside in the rain?
It all depends on the model's protection rating and sheath, as well as the protection of the connectors: a strip designed for outdoor use withstands splashes, not immersion. Check the stated rating on the data sheet and place the junctions in a closed waterproof box.
LED ceiling lighting or LED strip: which to choose for a terrace?
An LED ceiling light or LED wall light illuminates an area and makes a passage safe; the strip highlights a line, a wall, a step, and sets the mood. On a covered terrace, the two are often combined: the fixture to see clearly, the strip for accompanying light.
Which outdoor LED strip to choose between warm white and RGB?
Warm white, around 2700 to 3000 K, suits a facade or terrace you want warm and stable. RGB serves a changing mood, with a controller and remote to plan for. If the strip must also light properly, an RGBW provides a dedicated white.
How to connect a 220V LED strip to the mains?
The connection is made with the power off, on a protected junction box, with a cable gland for the cable entry. This work on an outdoor circuit is down to a qualified installer: the strip is prepared and fixed, the link to the network is confirmed afterwards, once waterproofing is assured.