Outdoor LED strips for stairs
This selection is also available in our French store: Rubans LED d exterieur pour escalier
No products in this selection.
- Tracked delivery to your country Tracked delivery
- Secure payment at checkout Multiple payment methods
- 14 days to change your mind 14-day returns
- Secure payment Secure payment
Not sure of your style? Find it in 30 seconds
A few questions, and we will show you the pieces made for you.
Frequently asked questions
How do I choose the right product?
What are the delivery times?
Can I return an item?
Can I pay in instalments?
An interior that reflects who you are
Carefully selected pieces, shipped from our warehouses. Our team advises you before you buy, so you choose with confidence.
- Tracked delivery
- Pay in instalments, where available
- 14 days to change your mind
- Advice & showroom in Lyon, France
Allow one profile per step and a strip slipped underneath, casting grazing light under the step nosing: the climb then reads at a glance, without dazzling the person going up. The rest comes down to three concrete points: sealing, supply voltage and colour temperature.
How do you light a staircase?
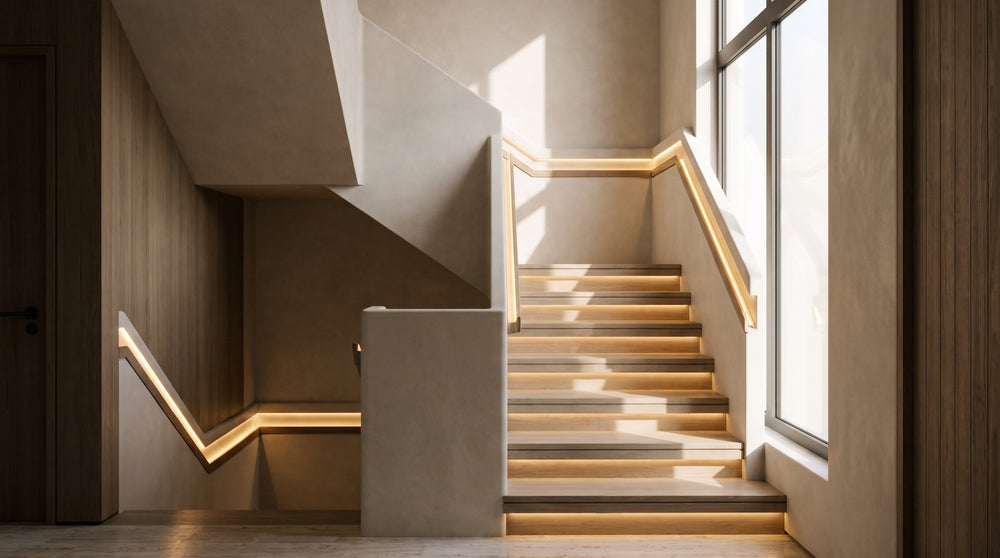
A strip placed under the nosing of each step, held in a profile, gives grazing light that outlines the edge without dazzling. It runs on low voltage, the light is triggered by a sensor placed at the top and bottom of the flight, and the stairs light up before your foot touches the first step.
Direct lighting or grazing light: what do you see on the stairs?
Light projected from the ceiling lights the void above the steps and leaves the nosing in relative shadow: the boundary between two steps becomes blurred. A grazing strip does the opposite, it draws the edge of each step, which is enough to guide the foot with little power. For domestic traffic, two or three points spread over the flight are better than a uniform wash.
Indoor or outdoor staircase: the same installation?
The principle stays the same, the protection changes. Indoors, a simple strip is enough; outdoors, you need a strip protected against dust and splashes, and a profile that keeps it away from wet ground. Outdoor waterproof LED strips meet this need, and all LED strips cover indoor flights. A sensor set too wide will light up the street on every pass: better to aim at the first step.
Which LED strip should you choose for outdoors?
For outdoors, aim for a strip protected against dust and water jets, a profile that keeps it away from wet ground, and a power supply placed under cover. Low voltage is justified near a step where people walk barefoot; 220 V removes the driver but requires a more careful installation.
The basic criteria for an outdoor LED strip for stairs
Three criteria make the difference on an exposed step. The protection rating first: in a sheltered outdoor area, IP44 may be enough; in direct rain, aim for IP65, and IP67 if the strip may be briefly immersed. UV resistance next, for a strip that gets sun behind a railing. The profile material finally: aluminium dissipates heat and stiffens the line. A flexible strip without a profile works loose, peels off and gets dirty quickly. See also outdoor lighting protected from moisture for porches and covered terraces.
What changes in a detached house
In a house, the outdoor staircase is often the only path between the garden and the door: it must work every evening without thinking about it. Favour a power supply indoors, a branch per flight and a sensor per access, rather than a long length of cable crossing the lawn. The same reasoning applies to strip lighting for pools, where repeated passage at the water's edge imposes the same rigour on connections.
Outdoor LED strips for concrete stairs: which nosing profile?
On a concrete staircase, the profile is fixed under the step nosing, set back from the tread edge, with plugs suited to a solid substrate. A surface-mounted model is easier to fit than a recessed one, which requires cutting into the step; in both cases, the strip stays protected from kicks.
Recessed or surface-mounted profile on a concrete step
A recessed profile gives a flush line, with no protrusion under the nosing: the result is clean, but it requires a straight groove and a consistent depth, which assumes a workable substrate or suitable tools. A surface-mounted profile is screwed under the step overhang and can be replaced without breaking anything. On concrete, this is the pragmatic choice: four to six fixings per step depending on width, and a check of foot clearance.
Wood, tile or stone staircase: what changes for fixing
On wood, gluing onto a dry, dust-free substrate holds well, provided you do not lay it on a freshly stained step. On tile, screw into the substrate under the tile rather than into the tile itself. On stone, prefer surface-mounted so as not to drill a visible step nosing.
| Staircase type | Suitable strip | Protection rating to aim for | Where to place the strip | What to check |
|---|---|---|---|---|
| Outdoor concrete | Flexible strip in aluminium profile | IP65 | Under the step nosing, set back from the tread edge | Plugs suited to a solid substrate |
| Outdoor wooden steps | Protected strip, slim profile | IP65 | Under the step nosing or in a groove | Dry substrate before gluing |
| Indoor wooden staircase | Warm white strip 2700 K or 3000 K | IP20 sufficient | Under the step nosing, grazing light | No reflection on the floor |
| Outdoor metal stringer | Strip in profile, sheathed cable | IP65 | Along the stringer, on the wall side | Cable routing under cover |
| Landing or covered porch | Strip in profile or surface-mounted | IP44 to IP65 | Under the slab or as a skirting | Rainwater runoff |
Motion sensor or switch: how do you make the descent safe?
A motion sensor placed at the top and bottom of the flight lights the stairs before your foot touches the first step. The timer keeps the light on during the climb, the dusk sensor reserves it for night. A manual switch remains useful as a backup and for maintenance.
Motion sensor, photocell or timer: which for a staircase?
A motion sensor is best suited to a passage: it switches on as you approach, switches off after an adjustable time, and combines with a photocell so it does not operate in daylight. A timer alone suits a staircase used regularly. Position the sensor so it sees the first step and the landing, never the street or a neighbouring passage, to avoid false triggers. Allow a hold time of around two to three minutes on a tall flight.
Where to place the sensor so it sees the first step
At the top of the flight, pointing down the stairs, away from a heat source or a window that distorts detection. At the bottom of the flight, at hand height, to catch the person coming from the garden. Both heads connect to the same circuit: the stairs light the same way going up and coming down, which matters when carrying a box.
Which light colour for the staircase and for the living room?
A warm white around 2700 K to 3000 K suits a staircase that continues a living room or an open kitchen: the light stays soft and consistent with the decor for the kitchen visible from the steps. RGB and RGBW versions are more for changing the mood than for lighting a passage.
2700 K or 3000 K: which light for a staircase?
2700 K leans towards evening ambience, close to a classic bulb, and pairs well with a staircase serving bedrooms. 3000 K stays warm but a little crisper, which helps read a dark step. The useful rule is continuity: the same white family on both sides of the stairwell avoids a break visible from the sofa. See the 2700 K LED strips with amber light and the 3000 K warm white LED strips.
Light colour for a living room: staying consistent from room to room
If the living room ends in a modern open kitchen decor, the staircase is part of the setting: its light must belong to the same family as the worktop's. A coloured strip on a staircase seen from the living room changes the whole perception of the space. For a seasonal mood, RGB LED strips with variable colour and RGBW LED strips with adjustable white let you switch between guiding white and welcoming colour.
| Temperature | Rendering | Where to use it |
|---|---|---|
| 2700 K | Warm white, close to a classic bulb | Staircase continuing a living room or open kitchen |
| 3000 K | Slightly crisper warm white | Indoor staircase, landing, entrance |
| RGB | Fixed or animated colour | Terrace staircase, seasonal mood |
| RGBW | Adjustable colour and white | Mixed staircase: white to guide, colour to welcome |
Stair wall light, LED ceiling light or strip: which solution should you choose?
The strip marks each step and guides the foot, the stair wall light lights the landing and the wall, the LED ceiling light covers the whole space but leaves the steps in flat light. On a narrow flight, the strip is enough; on a wide or winding staircase, the three complement each other.
Stair wall light: when it complements the strip
It takes over where the under-step strip gives only a line on the floor: arrival wall, wide landing, winding flight. Placed about 1.80 m from the floor or aligned with the other wall lights in the house, it lights the wall and makes the arrival safe. Browse all the lighting in the house to match the wall light to the rest of the circulation.
LED ceiling light: what it lights and what it leaves in shadow
It covers the stairwell with downward light, useful for cleaning or moving, less so for telling two dark steps apart. With a generous ceiling height, it complements the strip without replacing it. For a corridor or an entrance, choose a ceiling model from lighting suited to each room.
How do you install and maintain an outdoor LED strip for stairs?
Installation comes down to four steps: clean and dry the step, clip the strip into its profile, fix the profile under the step nosing, run the cable to a sheltered power supply. Outdoors, maintenance is limited to removing leaves and sand and checking that the profile drains water.
24 V or 220 V supply: what it changes for wiring
At 24 V, a driver transforms the current and must be placed in a dry spot, with voltage drop to watch over a long flight: 24 V low-voltage LED strips require a correctly sized low-voltage power supply for strip. At 220 V, no driver, connection is direct, which simplifies long distances; 220 V LED strips without transformer however require a well-closed profile and waterproof connectors at every exposed connection.
What damages a strip outdoors, and how to avoid it
Water pooling in a badly angled profile, sand building up, leaves blocking the drain and the original adhesive failing in the sun. A profile angled outwards, a seal checked once a year and cleaning with clean water are enough to hold up. Never stick a strip onto a damp substrate.
How do you prepare a custom LED strip kit for a staircase?
A custom kit is prepared with three measurements: the width of one step, the number of steps and the distance to the power supply. Add the length of cable needed between branches, then allow one profile per step and a waterproof connector at every exposed connection.
Measuring a step and the total run of the flight
Measure the usable width of the step, then count the steps actually lit, landing included. Multiply to get the strip length, add the length of cable running from one step to another, then the distance to the power supply. Allow a connection margin at each end, never a strip stretched to the millimetre.
What else to plan: profiles, branches, waterproof connectors
One profile per step, an end cap at the ends, one branch per flight and waterproof connectors for every connection outdoors. For indirect ambience in the adjoining living room, see the LED strips for indirect lighting. Payment is secure on the shop, delivery is tracked and returns are possible; Designix customer service answers questions on quantities and cable cross-sections.
Frequently asked questions
When should you plan a stair wall light in addition to the strip?
The wall light is useful when the strip does not cover everything: wide landing, arrival wall, winding flight. It lights the wall and the circulation space, where the under-step strip gives only a line of light on the floor. It also makes safe the arrivals the sensor does not see.
How do you fit an LED strip on a concrete staircase?
Clean and dry the step, fix a surface-mounted profile under the step nosing with plugs suited to concrete, clip the strip into the profile, then run the cable to a sheltered power supply. Recessing requires cutting into the step, which assumes a workable substrate.
Which outdoor LED strip: 24 V or 220 V?
24 V is a low voltage, safer near steps, with a driver placed under cover and voltage drop to check over long flights. 220 V connects without a driver and simplifies long distances, but requires a closed profile and waterproof connections.
How do you fix an LED profile on a step nosing?
The profile is screwed or glued under the step overhang, set back from the edge the foot strikes, so the light falls on the next step. Check that the profile drains water outwards and that the cable does not rub on the edge.
How much strip should you allow for a full flight?
Add up the width of each lit step, then the length of cable between steps and to the power supply. Allow a margin at each end for connections. A winding staircase also requires cable routing in the corner, often forgotten when measuring.
A successful outdoor staircase comes down to three decisions: a protected strip, a profile set back from the tread edge, automatic switching that sees the first step. Measure the flight, choose the colour temperature according to the room the staircase continues, then move forward with all LED strips and the lighting for the home.