HOW TO CHANGE AN INTEGRATED LED BULB?
This article is also available in French: COMMENT CHANGER UNE AMPOULE LED INTÉGRÉE ?

Do you want to change an integrated LED bulb in your home? Whether for ceiling lights, recessed spotlights, or other fixtures with integrated LED bulbs, this guide is for you. Replacing a halogen bulb or solar floodlights does not require advanced electrical knowledge. Tutorials are available to help you.
Handling tools or equipment such as tape sockets should not be new to you. Whether in the living room, bedroom, or bathroom, an integrated LED bulb offers unparalleled comfort. Here is how to change an integrated LED bulb.
WHAT IS AN INTEGRATED LED BULB?
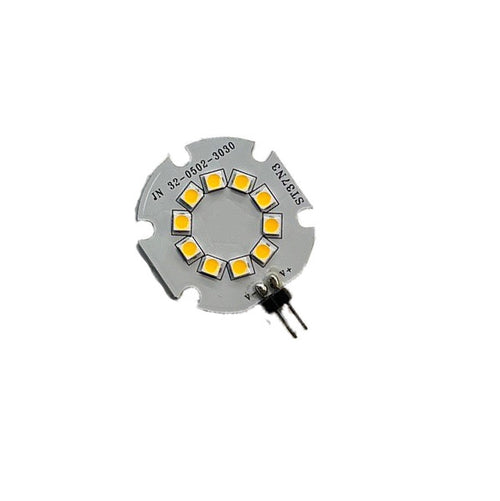
An integrated LED bulb, also known as a fixed-base bulb, combines both the bulb and the fixture into a single product. Unlike traditional bulbs that can simply be removed, integrated LED bulbs are designed to be permanent and cannot be easily replaced.

These bulbs are often used in ceiling lights, recessed spotlights, and other fixtures due to their high energy efficiency and long lifespan. They consume much less electricity than other types of bulbs while producing powerful and bright light, thus reducing your electricity bills and your carbon footprint.
In addition, they have an exceptional lifespan, capable of operating for thousands of hours before requiring replacement, thereby reducing hassle and environmental waste. They also offer different color and temperature options (warm white or cool white) to create the perfect ambiance in every room.
WHY CHANGE AN INTEGRATED LED BULB?
There may be several reasons to change an integrated LED bulb. First, even though they last for years, they must be replaced at some point. Second, if your integrated LED bulb is no longer functioning properly, it must be replaced. A dim or flickering light may indicate that the bulb is at the end of its life.

Changing an integrated LED bulb can also improve your space's lighting. New technologies often offer superior performance in terms of light output and quality. Moreover, older halogen bulbs consume much more energy than modern LEDs. By replacing them with integrated LEDs, you can reduce your monthly energy bill.
Regular bulb replacement also allows for proper maintenance of the fixture. You can check all electrical system components to ensure the overall proper functioning of the fixture. Make sure to choose the right bulb for each installation.
STEPS TO CHANGE AN INTEGRATED LED BULB
To change an integrated LED bulb, follow these simple steps:
- Turn off the power supply: Be sure to cut the power to the fixture at the main circuit breaker or using the specific switch to ensure your safety.
- Remove the old LED bulb: Follow the manufacturer's instructions or turn the bulb slightly counterclockwise to unlock it. Do not force it, to avoid damaging the fixture.

- Insert the new LED bulb: Properly align the pins with the corresponding sockets and turn the bulb clockwise until it is securely fastened.
- Restore the power supply: Turn the power back on and test whether the new bulb is working properly. If it does not light up or flickers, check its installation or replace any defective components.
Changing an integrated LED bulb is not complicated, but it is important to take some precautions. If you do not feel capable, calling a professional is recommended. However, for the integration of this type of bulb into your interior, it is preferable to do it yourself to ensure perfect harmony with the room's decor.
DETERMINING THE TYPE OF INTEGRATED LED BULB
To change an integrated LED bulb, it is essential to determine the type of bulb you need. LED bulbs vary in terms of shape, size, and base. Consult your fixture's documentation or the manufacturer's website to get specific information. You can also inspect the old bulb to find details such as wattage, color temperature, and dimensions.

Carefully examine the base. Bases are often identified by an alphanumeric code that indicates their specific size and shape. If you cannot find this information, seek advice from a professional or contact the manufacturer's customer service.
CUTTING THE POWER SUPPLY
Before changing an integrated LED bulb, it is essential to cut the power supply. Locate the circuit breaker or fuse corresponding to the lighting in question. Completely turn off the switch associated with the area where the bulb is located. Open the electrical panel and look for the breaker corresponding to the lighting circuit. Flip the breaker to the "off" position to cut power to the fixture.

REMOVING THE OLD LED BULB
To remove the old integrated LED bulb, follow these simple steps:
- Ensure the power supply is cut.
- Carefully examine the fixture to identify how to access the bulb.
- Gently remove the trim or band holding the bulb in place.
- Hold the old LED bulb firmly and turn it counterclockwise until it detaches from the base.
- Prepare the new bulb by ensuring it meets the manufacturer's specifications. Gently insert it into the base and turn it slightly clockwise until it is securely fastened.

INSERTING THE NEW LED BULB
Ensure the power supply is still cut. Gently remove the old LED bulb. Carefully clean the holder and contacts to remove any dust. Insert the new LED bulb by properly aligning the base with the corresponding pins. Turn it clockwise until it is securely fastened. Restore the power supply and test your new integrated LED lighting.

RESTORING POWER AND TESTING
After inserting the new LED bulb, restore the power supply:
- Make sure the fixture switch is off.
- Verify that the power is cut using a tester.
- Turn the switch back on or reactivate the circuit breaker.
- Test the LED bulb to verify it works. If everything is in order, enjoy your new lighting.

PRECAUTIONS TO TAKE WHEN CHANGING AN INTEGRATED LED BULB
Take certain precautions to ensure your safety:
- Cut the power supply before starting.
- Gently remove the old LED bulb by following the manufacturer's instructions.
- Insert the new LED bulb while ensuring it is correctly aligned with the base.
- Carefully restore the power supply and test the lighting.

IN WHICH ROOMS SHOULD YOU INSTALL INTEGRATED LED BULBS?
Every room in the house can be lit with an integrated LED bulb. In the living room, for general or functional lighting. In the bedroom, for bedside lamps. In the kitchen and bathroom, for an atmosphere ideal for any activity. This type of bulb is perfect for all rooms.

ADVANTAGES OF INTEGRATED LED BULBS
Integrated LED bulbs offer many advantages:
- Energy saving: They consume little energy, reducing your electricity bill.
- Extended lifespan: They last much longer than traditional bulbs, reducing costs and replacement frequency.

- High light efficiency: They produce an intense and clear light with high light efficiency.
- Varied choice: Available in a wide range of colors and shapes.
- Environmentally friendly: Low electricity consumption and absence of harmful substances such as
In stock · shipping costs shown at checkout · up to 30% off in your cart


Ready to turn inspiration into reality?
Tell us about your room, your style and your budget, and we will show you the pieces that truly suit your project.
Get guidance in 30 seconds →