
Recessed living room spotlights: layout and spacing requirements
This article is also available in French: 5 Conseils Pour Installer Des Spots encastrés Dans Votre salon
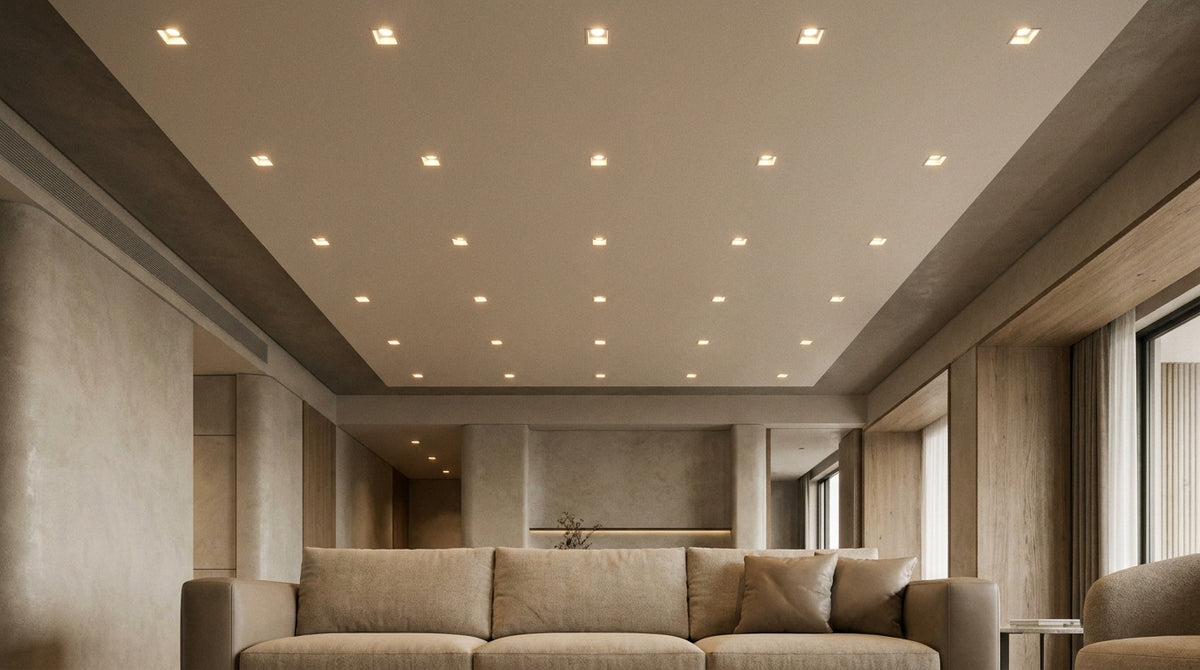
Poorly distributed spotlights create shadows above the sofa and pools of light on the floor. It is the exact opposite of what you want from a well-thought-out living room. The good news is that a successful installation comes down to two simple calculations: the spacing between the light points and their distance from the walls.
Before you drill anything, this article provides you with the mathematical method to distribute your spotlights without creating shadows. If you are taking advantage of a renovation of your living space to rethink your lighting, this is the perfect time to map out your plan. For the general approach, our guide on how to effectively light your living room serves as a great complement to these guidelines.
How do you position spotlights in a living room?
Position your spotlights in a regular grid, aligned with the axes of the room, with a distance of about 50 cm from the walls. Place them above functional areas (sofa, coffee table, bookcase) and maintain constant spacing between each point to achieve homogeneous light, with no corners left in the dark.
Think in terms of usage first, not decorative symmetry. A living room often combines three needs: general lighting, task lighting near seating, and an evening ambient touch. The arrangement of the ceiling spotlights in the living room should serve these three layers.
- General lighting: a grid of spotlights distributed over the entire surface.
- Accent lighting: one or two adjustable spotlights on a bookcase or a painting.
- Ambience: a warm color temperature, ideally used with a dimmer.
Temperature matters just as much as position. A white that is too cold makes a living room feel harsh; to help you decide, our comparison of white vs. yellow light helps you choose before you buy.
What is the ideal distance and spacing between spotlights?
Count on a spacing equal to about half the ceiling height: for a 2.50 m ceiling, aim for spotlights every 1.25 m. Keep at least 50 cm between a perimeter spotlight and the wall. This rule provides even illumination, without highlights or shadows between two points.
This industry convention—spacing relative to height—is what most online guides are missing. It prevents two costly mistakes: spotlights that are too close together and cause glare, or too far apart, which leave dark gaps.
Let’s take a 4 m by 5 m living room with a 2.50 m ceiling. Target spacing: 1.25 m. Along the length, this results in 4 spotlights per row (a 50 cm distance at each end, then 1.30 m between them); along the width, 3 rows. This gives you a balanced grid of 12 spotlights.
To refine the number based on the surface area and the desired power, use our method to calculate the amount of light needed. Lumens are more important than the number of points.
Once your spacing plan is set, all that’s left is to choose the models: browse our living room lighting collection to find spotlights and ceiling lights suited to the height and style of your room.
Which room do you want to install your recessed spotlights in?
How do you install ceiling spotlights? The installation steps
To install a ceiling spotlight: turn off the power, mark your grid with a pencil, drill using a hole saw to the diameter of the spotlight, pull and connect the wires, connect the transformer if necessary, then clip the spotlight into its housing. Check the alignment before turning the power back on.
A few details make a difference on a real job site. The drilling diameter must match the spotlight collar exactly: 3 mm too much and the mounting clips will no longer hold the panel. Also, locate the joists or rails of the suspended ceiling before drilling.
On a single line, it is better to plan the wiring ahead of time. Our guide on how to wire your spotlights in series details clean 220V wiring, including the transformer, without overloading the supply.
What height, clearance, and standards should be respected?
Allow for a void of about 10 cm above the ceiling to house the body of the spotlight and its transformer. Without a false ceiling (solid concrete slab), recessed installation is impossible: opt for surface-mounted spotlights or a rail system. Regarding safety, comply with the NF C 15-100 standard and the volume regulations for damp rooms.
The NF C 15-100 standard governs lighting circuits and, above all, safety distances near water sources. In a dry living room, the requirements are light; they become strict as soon as a bathroom or kitchen is involved.
When there is a lack of clearance, the surface-mounted alternative remains elegant: a model from the ceiling lamp collection can be installed directly on the slab, without recessing. For routine maintenance, knowing how to change the bulb of a recessed spotlight will save you a lot of trouble.
Any doubts about your ceiling configuration or the number of circuits? The safest bet remains to ask our team for advice before you drill.
What is the best layout for bathroom ceiling spotlights?
In a bathroom, the layout follows safety zones. Above the shower or bathtub (Zone 1), use spotlights with a minimum IP65 protection rating and extra-low voltage. More than 60 cm away from water sources (Zone 2 and outside the zones), an IP44 rating is sufficient. Keep the same regular grid as in the living room.
The spacing principle does not change: half the ceiling height, 50 cm from the walls. What changes is the water-tightness. A standard living room spotlight should not be used above a shower.
- Zone 1 (above the shower/bathtub): IP65, SELV 12V.
- Zone 2 (up to 60 cm): IP44 accepted.
- Outside zones: standard spotlights, just like in the living room.
Aligning the spotlights with the axis of the vanity and having one point above the mirror provides lighting without casting shadows on the face, which is the objective in this room.
In stock · shipping costs shown at checkout · up to 30% off in your cart


Ready to turn inspiration into reality?
Tell us about your room, your style and your budget, and we will show you the pieces that truly suit your project.
Get guidance in 30 seconds →


